Adobe did such a great job of thinking of everything in the entire Creative Suite, they even thought of ways to let us think of our own ways to improve upon it, if you can follow this twisted logic. In this article, I'll share some Illustrator tweaks and customizations that you may find useful.
1. Custom Keyboard Shortcuts
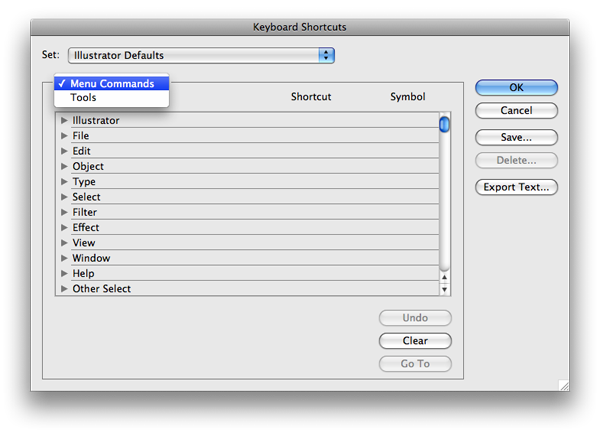
Keyboard shortcuts are absolutely the way to work in Illustrator, as in all computer work. Learn them by observing the key combos in the menus and tool tips. The more you use them, the more time you'll spend creating, rather than mousing to menus and toolbars all day. Adobe has even included a way to write your own. Just go to Edit > Keyboard Shortcuts (Command + Alt + Shift + K), which will open the Keyboard Shortcuts dialog.
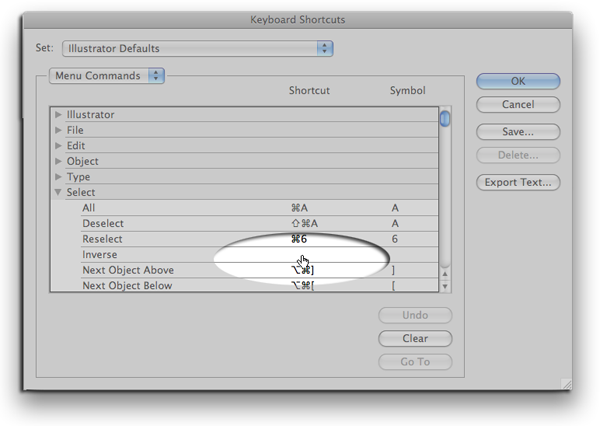
Most tools already have good shortcuts, but many menu commands could use some. I'll show you how to do one good one. Select Menu Commands in the drop-down menu. Open the triangle drop-down for the Select menu. Click in the Inverse row in the blank space of the Shortcut column, which my cursor is pointing to in the image below. Type Command + Shift + I (for Inverse), which is the same as the Select Inverse shortcut in Photoshop.
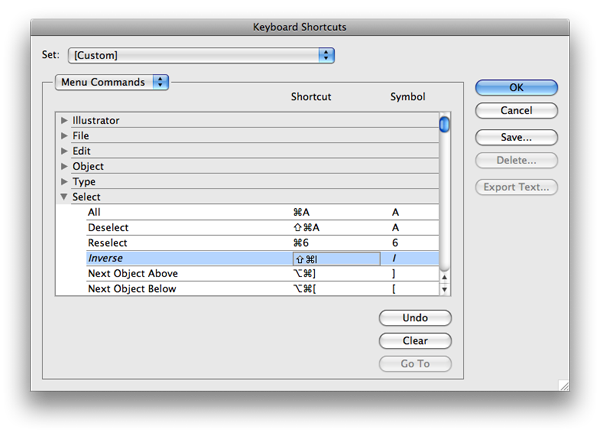
Great, but what good is it? OK, let's say you're working on a complicated file with zillions of items, but you're trying to edit just one of them. Select that one, invoke your new Select Inverse command, and hide all that extraneous goo temporarily by hitting Command + 3, or lock it all with Command + 2. Edit away, and when you're done, hit Command + Alt + 3 (or Command + Alt + 2) to show (or unlock) everything. You've just saved yourself all kinds of grief by invoking two or three simple shortcuts.
When you've got a collection of shortcuts you like, save that set by hitting the Save button. Give it a name like "Tom's Illus Keyset." Then it will be available in the Sets dropdown at the top of the dialog.
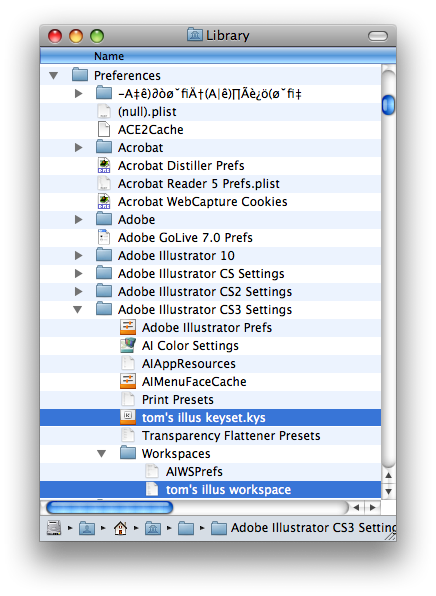
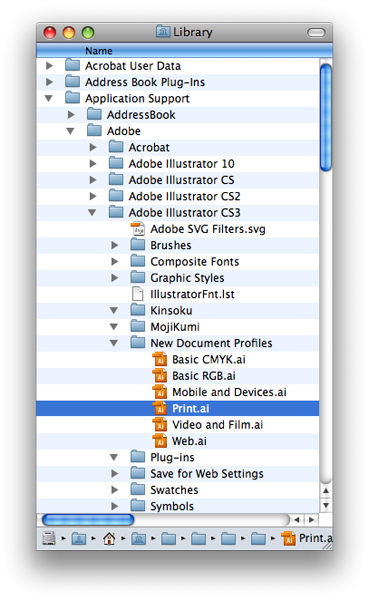
Alternatively, I've posted my very own Keyset here. Mac users put it in your User Library > Preferences > Adobe Illustrator CS3 Settings, as shown below (This is also where you place Workspaces as well). Windows users can try Documents and Settings > User > Application Data > Adobe > Adobe Illustrator CS3 Settings. It's got a few more shortcuts for things like changing case, selecting by fill color, and exporting. Just a few but I find them essential.
2. Create Custom Workspaces
Custom Workspaces are cool too. When you've got all your palettes just where you like them, go to Window > Workspace > Save Workspace. The screenshot above shows where that file gets stored. As a freelancer, I often have to work on other peoples' Macs. I keep my customized Keyset and Workspace files on a thumb drive or iPod so I can install them on any Mac I happen to be working on. That way I feel at home wherever I am, and can hit the ground running when freelancing in outside studios.
One more tip while we're here - if Illustrator ever starts acting weird, trash that "Adobe Illustrator Prefs" file in the same Settings folder. Then quit and relaunch. The program will revert to its factory defaults, but the weirdness should disappear. That happened to me just today, when my black Selection Arrow tool lost its transform handles - again! Don't know if it's ever happened to you, but it's happened to me many times in all versions of CS. And that's the only cure I've found.
3. Create a Custom New Document Profile
I dislike the way Illustrator documents are by default positioned on my screen when I first create a new one. The window is full-screen and the palettes obscure the doc's scrollbars. And I like my brush sets and color palettes just so.
Fortunately, Illustrator has a way that you can create your own default new document that will always open the way you want. You can follow the directions found for Create a Custom New Document Profile (Illustrator CS3) at Adobe's online help. The options described in Step 3 from the online help follows:
3. Do any of the following:
- Create any colors, patterns, and gradients you want, and save them as swatches. You can also import swatches using the Swatch Libraries command and then move the swatches you want in the Document Profile file into the default Swatches panel.
- Save any graph designs that you want available in your files using the Graph Design dialog box.
- Create any graphic styles you want and save them to the Graphic Styles panel.
- Create any brushes you want and save them to the Brushes panel.
- Create any symbols you want and save them to the Symbols panel.
- Select the options you want as default settings from the following: View preferences (from the View menu), ruler origins, page origins, print settings (in the Print dialog box, File > Print), and actions.
That's another good one to keep on your thumb drive or iPod, in case you have to work on someone else's computer.
4. Scripts
Adobe CS programs are all scriptable. What's that mean? It means that geeks the world over have spent sleepless nights writing some superb scripts which extend Illustrator's capabilities beyond what came in the box. Many of these folks are preparing for sainthood by freely sharing their scripts with you, and asking for nothing in return.
Round Any Corner
One such Illustrator script I wouldn't live without is Round Any Corner. Download it from the Adobe Illustrator Exchange. Check out the site while you're there. It's a great resource. Put the script in your Applications folder. It will then become available in Illustrator's Scripts menu.
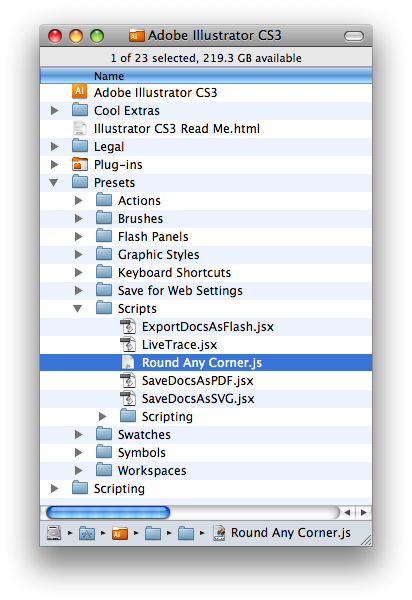
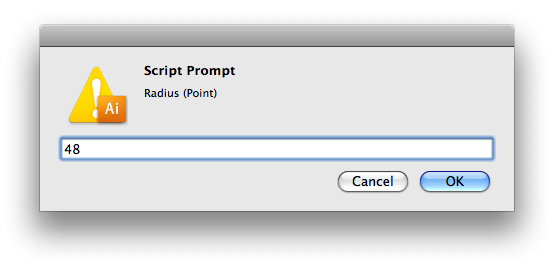
To use the script, select the point(s) you want rounded and go to File > Scripts > Round Any Corner. It'll ask you what radius you want in points, so be prepared. Keep in mind that there's no preview like in real Adobe menus though. One of these days Adobe will add that to the regular feature set. Until then, we've got this!


Collect for Output
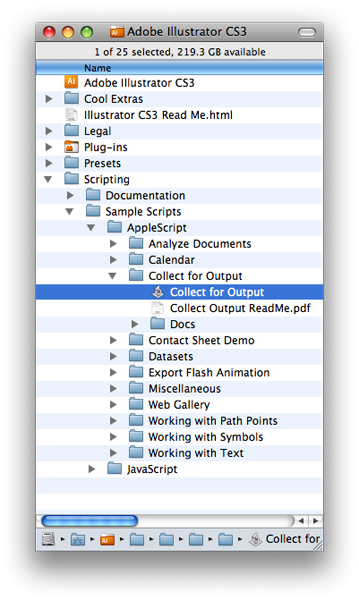
You already have this very useful script because it's installed by default at Applications > AICS3 > Scripting > Sample Scripts > AppleScript > Collect for Output. Check out others in there too! This script collects all of an AI doc's linked files into one folder for sharing with your client, printer, or service bureau.
This one doesn't work from the Script menu. Instead, you drop a file or folder full of files onto the icon. I keep one in my Dock for this purpose. It'll ask you to point to a new folder where it'll dump everything. I usually create a new folder called "Collect" in that dialog.
If only it would collect fonts, sigh, but I guess Adobe doesn't want to encourage us to freely copy and distribute fonts. I've tried modifying the script to add this functionality, but it's a bit beyond my rudimentary skills. If any of you geniuses out there can add font collection to this script, please share it with us in the comments below!
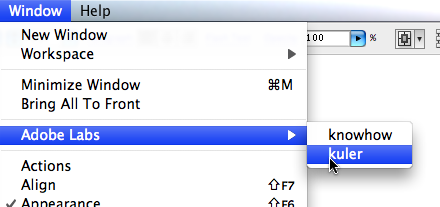
5. Kuler
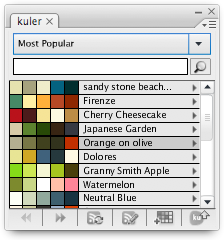
One of the cooler, if more obscure, AI customizers is stashed away in Window > Adobe Labs > kuler. This is an RSS feed of cool custom color palettes devised and shared by Illustrator geeks of the world, like you. You can add this palette to your personal workspace, and it uses very little screen real estate
When in need of inspiration, it's somewhere to turn. Even just the names people give their Kuler palettes might spark some serendipitous synapse in your creative noodle. Clicking the little triangle next to the name launches a browser window to the online kuler portal. The icons at the bottom do things like adding the chosen palette to your Swatches, etc. Pretty easy, yet power packed!
Conclusion
There you have it! Five ways to make the planet's best vector tool even better by adding your own unique twist to it. Experiment with these options and keep your favorites tools and custom settings available for when you need them.


No comments:
Post a Comment