
There are times when you will need to do gift box and effects for special occasions. This tutorial will give you an idea how this can be done using brushes and some other techniques. I will not be going into details how each step is done but I will illustrate on some of the techniques used to create this illustration.
1. Breakdown of Layers

The illustration consists of 6 different layers. We will look at how each layer is done.
2. Background Layer
The is the background mesh of the illustration. First we create a blue square and we start adding points using the Gradient Mesh Tool and tweak it to the the shape below. You can see that I have set the bottom points to a darker blue and the middle point to white.
3. Gift Box
Drawing the gift box is pretty simple. All you need is the Pen Tool. A tip for beginner is to turn on the Grid (View>Show Grid) and Enable Snapping(View>Enable Snap to Grid). With the grid on, you can precisely snap each points to the grid so that each intersecting shape will line up perfectly.

After you have drawn the gift box, fill it will different gradients to give the box volume. Finally, draw the ribbons to complete the illustration.
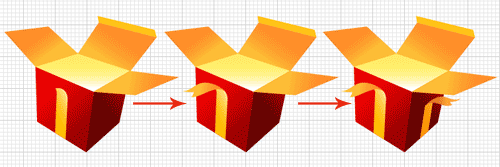
Here is the final gift box.

4. Line Patterns
For the line patterns on the gift box, you will find that there are actually some perspective. We can easily achieve the effect by using the Blend Tool. Below are the steps on creating it…
First we create a long rectangle and place it at the start point(left side). Next, we duplicate the rectangle and rotate it slightly and we place it at the end point(right side).

Select the Blend Tool. Click on the left rectangle stripe and hold Alt/Option and click on the right rectangle stripe. If you do it correctly, it would pop up the Blend Options. Select Specified Steps for Spacing and enter a value of 7.


This is what it will look like after we applied the blend correctly. Next, we need to expand the blend. Go Object>Expand to expand it into individual shapes.

Finally, we need to trim off the exceeding shape. Copy the rectangle face on the gift box underneath the stripes. Press Ctrl/Command+F to paste it in front. Select both the pasted shape and stripes. Open up Pathfinder and hold Alt/Option and select Intersect Shape to trim away the protruding areas. After that, we apply a gradient to the shape to achieve the effect I have done for my stripes.

5. Swirl Explosion
The gift explosion effect can be easily achieved by using the Brush Tool.

Let’s start drawing our swirly lines using your Pencil Tool or Pen Tool. Make sure you draw from one single direction, so that when you apply the art brush it will point in the same direction.

Next we will create the brush by drawing a long triangle stripe shape. Open up your Brushes Palette and click New. Select New Art Brush when the option pops up.

Finally, we select all the swirly lines and apply the new art brush we have made. (If the lines are going in the opposite direction, you can double click your Brush in the Brushes palette and check Flip Along to swap the direction.) You notice that I have varying widths for my swirly, you can do this by selecting each individual swirly and setting the line stroke to a smaller/bigger value.

After you are satisfied with what you have done. Go Object>Expand Appearance to expand the swirly. Open up your Gradient Palette and apply different gradients to your swirly to finish up the swirls. To hide the unwanted parts we can mask it out.

6. Fairy dust
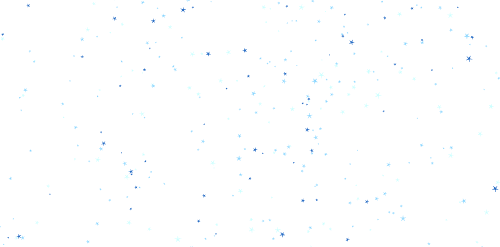
If you have no idea how to achieve this fairy dust effect in less than 3 mins.
Hope after reading this tutorial you will have a better idea on how this illustration is done.


No comments:
Post a Comment