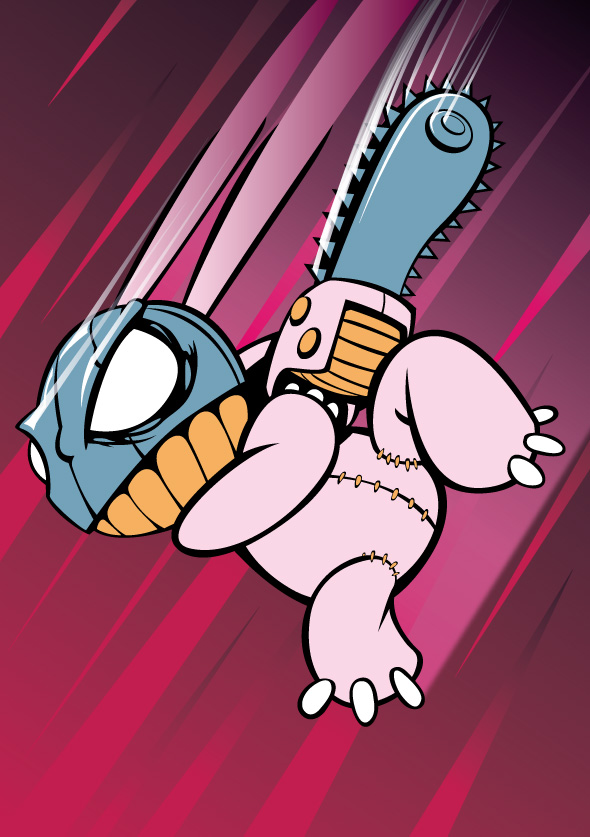
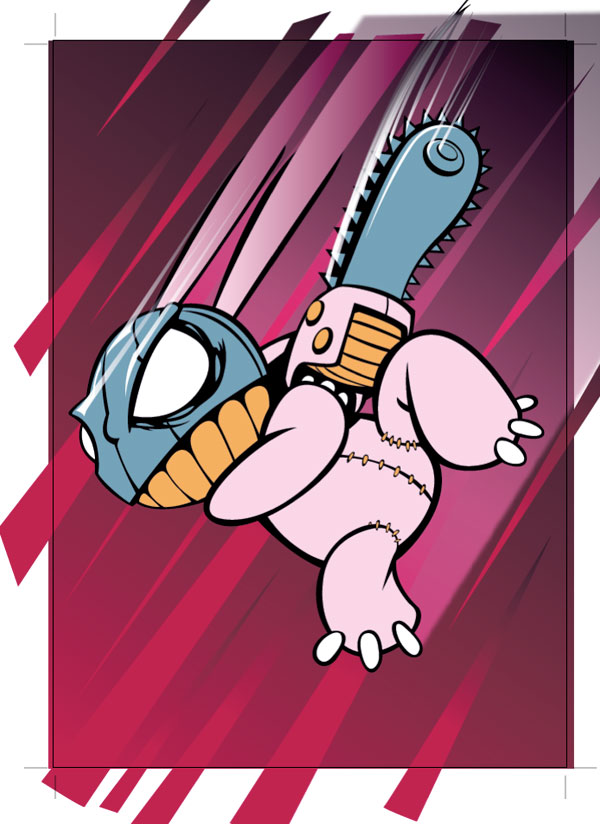
Final Image Preview
Step 1
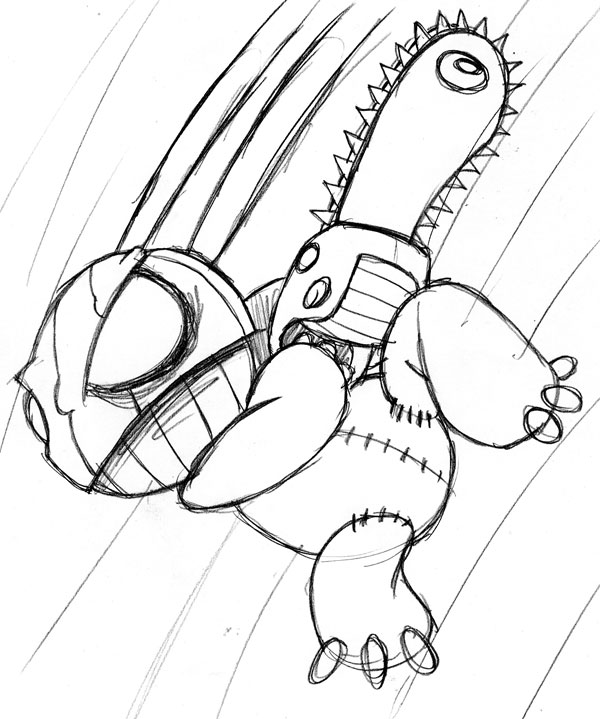
I can't stress the importance of sketching your character first, use whatever method you are most comfortable with. Vectors are a great finishing tool, but are not good for the sketch stage in my opinion. Get your idea down, tweak the proportions and overall look, then save the sketch as a jpg.
Make a new document in Illustrator (A4 is fine). Go to File > Place and navigate to and select the jpg of your character. With the placed sketch selected go to the Transparency Palette and turn down the transparency to about 30%. In the Layers Palette double click the layer and name it "Sketch," and lock it.
Step 2
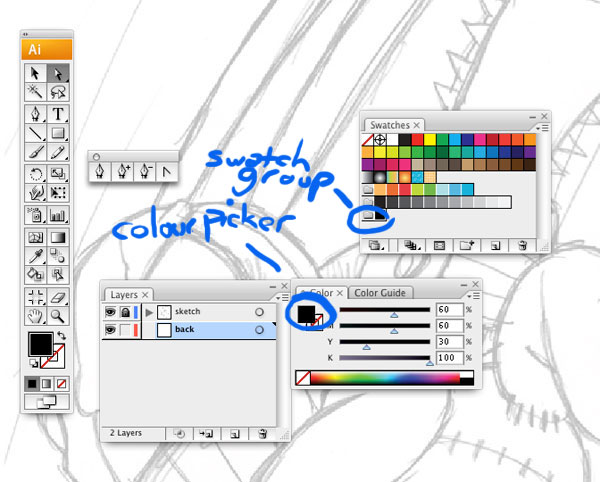
Make a new layer named "Back" and drag it under the "Sketch," layer. In the Color Palette set the Stroke to none and the Fill color to a rich black (C=60, M=60, Y=30, and K=100). In the Swatches Palette make a new Swatch Group, click and drag the black swatch from the Color Picker into the new Color Group folder. Each time you make a new color make sure you add a corresponding swatch to the color group, this allows for ease of color change and selection.
Grab the Direct Selection Tool (A) and then the Pen Tool (P), doing this will allow you to jump back to the Direct Selection tool while using the Pen by holding down Command which is very useful while drawing.
Step 3
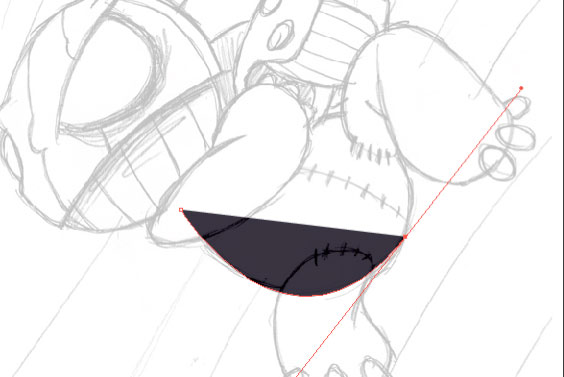
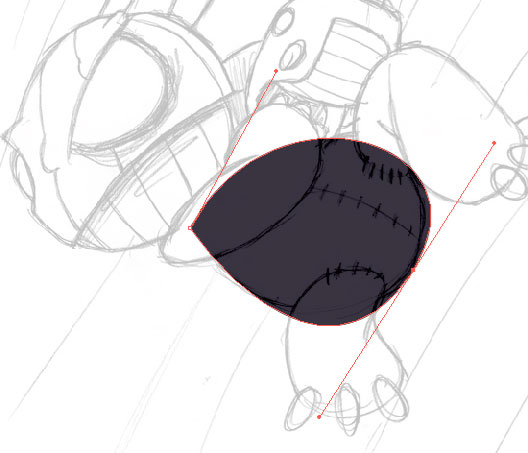
First, I begin by blocking in the basic shapes. The fewer points the better, look at where the shape changes or for the center of a curve.
One click with the Pen tool will start the shape. Move to an apex point on the shape, click and drag (do not let go after the click). When you drag out you create handles that influence the line, I like to think of the handles as magnets distorting a thin metal line. Let the handles go when you are happy with the curve.
Step 4
Finish the shape by clicking back on the first point. Don't worry if its not exactly right, as it is very easy to go back and adjust. Mousing over a point and holding down Command and dragging allows you to move the point or the handles. At this stage a points' handles are linked and move together.
Step 5
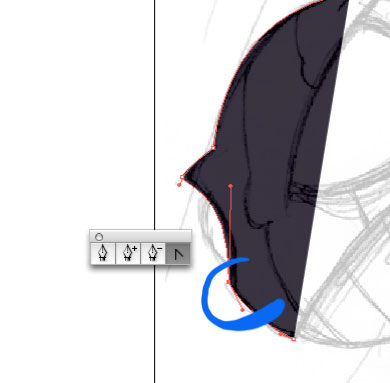
When making a shape such as this, place a point at the corner, drag out the handles to follow the curve going back, release, then click the point again. This will delete the handle going forward.

Step 6
Here you can see that I have de-linked the handles of this point. To do this, hold down Alt-click and drag one of the handles, it now moves independently from the other. If you hold Alt and click on the point both the handles will be deleted, you can remake them by holding Alt and dragging them out again.
Step 7
Follow the same techniques to create the other simple shapes that make up the character, remember that the more basic parts it has the easier it is to move them around to adjust the look. Also, having overlaying elements will make it easier in later steps.
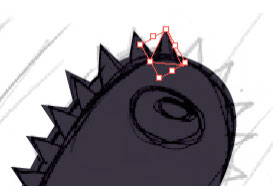
When making an area such as the spikes: draw a single triangle then get the Selection tool (V), hold Alt and drag the shape to make a copy. To repeat the copy multiple times hit Command + D.
Step 8
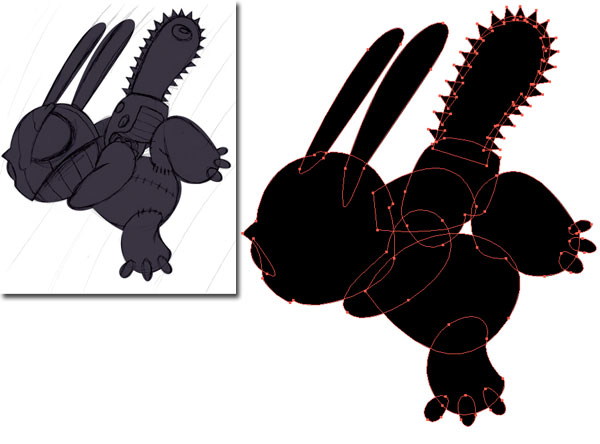
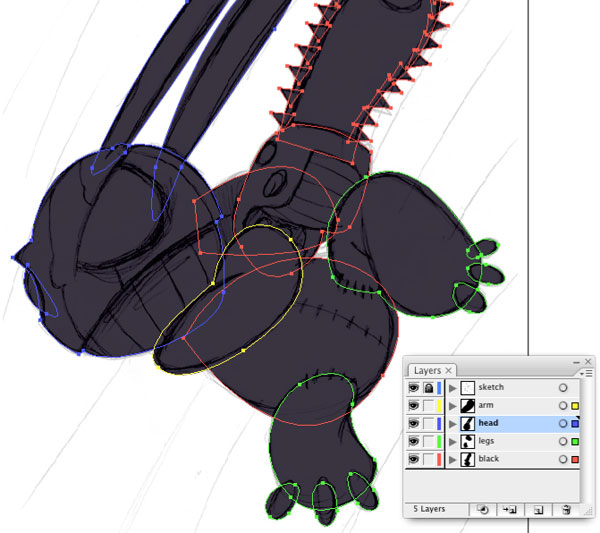
Below is the finished "Back" layer, as you can see the character remains in simple shapes. Now we can split parts up into separate layers.
Step 9
With the Selection tool (v), select the legs (holding Shift allows you to add to the selection, holding Alt will deselect objects). Cut (Command + X) the legs, make a new layer "Legs," select the Legs layer and Paste in Front (Command + F). Select the head objects, make a layer called "Head," cut the head objects and paste them in front on the "Head" layer. Select the front arm, make a layer called "arm," cut the arm shape and paste them in front on the that layer.
Step 10
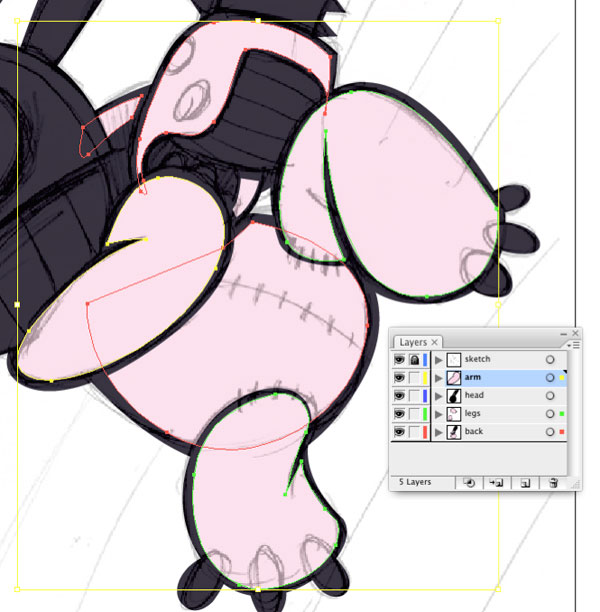
Use the Color Palette to choose a fill color for the body. I have used C=0, M=19, Y=0, and K=0. Exact color is not important right now though, as long as you keep it standard for the different parts of the character, its very easy to change when you are done drawing. Make a color swatch with your new color.
Below you can see I have made the body and the back arm shapes on the "Back" layer, move up the layer stack adding details to the various body parts.
Step 11
As you are drawing the various parts of the same color, make sure that you are working within the correct layer.
Step 12
When you are finished with the body color areas move on to the mask and chainsaw. I am using C=41, M=7, Y=5, and K=24. Make a color swatch with your new color. Unlock the "head" and lock the rest of the layers. For the first color pass I draw in the colors in reverse as you can see in the illustration.
Step 13
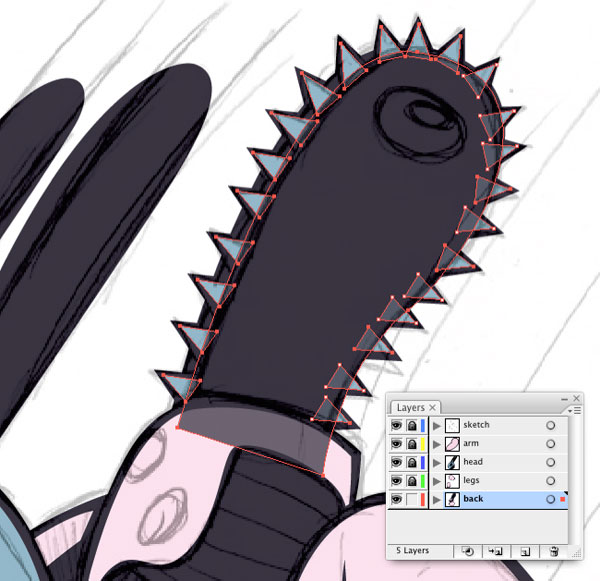
Once you are done with the mask relock the "Head" layer, move down to the "Back" layer and draw the blade and spike fills. Remember you can drag-copy the spike fills by Alt-dragging the shape. Once you have placed all the spike fills, select the black round saw shape with the Selection Tool (V), Copy (Command + C), Paste in Front (Command + F) and move it to the front of the layer stack (Command + Shift + Right Bracket key). Use the Direct Selection Tool (a) to select and edit points on the black shape in front showing more of the spikes on the left side of the chainsaw than the right.
In the illustration below I have made the front shape transparent and selected the spikes to show where the shapes crossover, which gives the desired effect.
Step 14
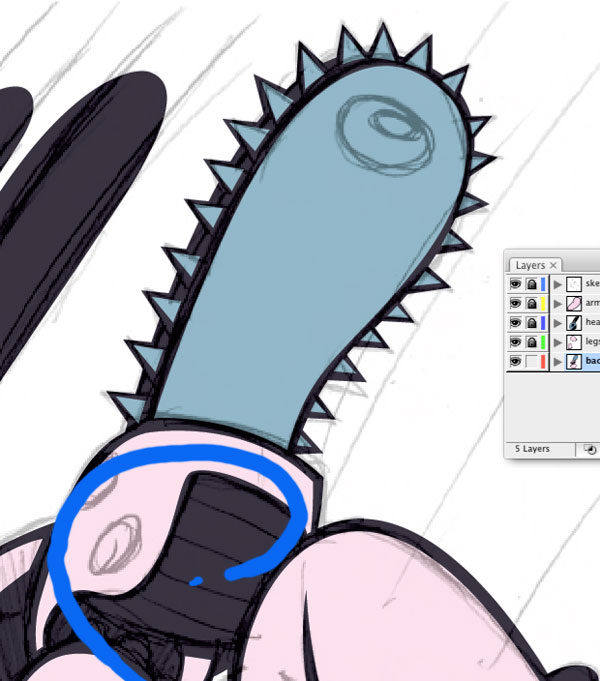
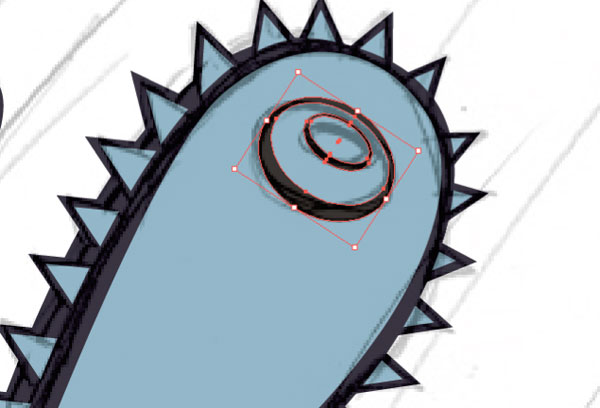
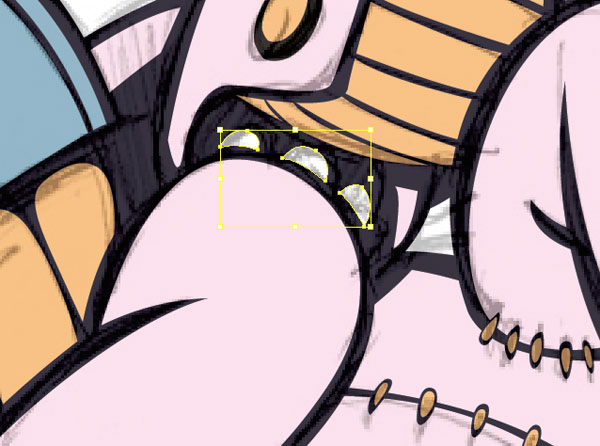
Select the grey from your Color Group, draw the central shape of the saw blade. Using the Selection Tool (V), select the handle shapes (circled below) and move them to the front (Command + Shift + Right Bracket key).
Step 15
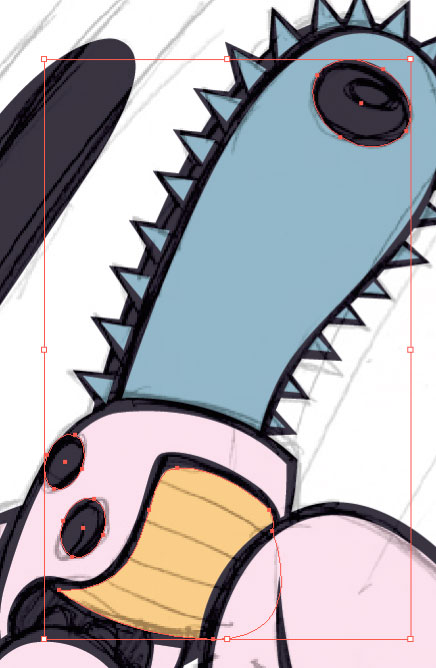
Select a fill color for the handle and add it to the swatch group. I used C=2, M=35, Y=70, and K=0. Make the handle shape. Select black from the swatch group, use the Ellipse tool (L) to make approximate detail circles, use the Selection tool (V) to distort and move them into place.
Step 16
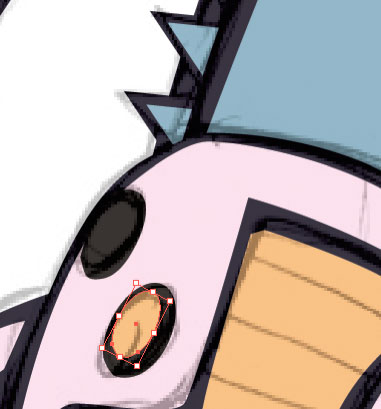
Select one of the circles with the Selection tool (V), Copy (Command + C) and Paste in Front (Command + F). Select the yellow brown swatch and distort the circle as shown. Pushing in the sides and corners as needed (holding Alt will constrain the movement to the center of the object). Repeat the process on the other button.
Step 17
Using the same process as the buttons, copy up, change the color, shrink, and distort the circle on the blade. When you are happy with the first level of circle select them both, copy, and paste in front. Shrink the new copy and position as shown below.
Step 18
Select the black swatch for the fill, use the Direct Selection tool (A), then the Pen tool (P) to draw in the handle details as shown. I like to have control of the line, so I tend not to use the Stroke very much if at all.
Step 19
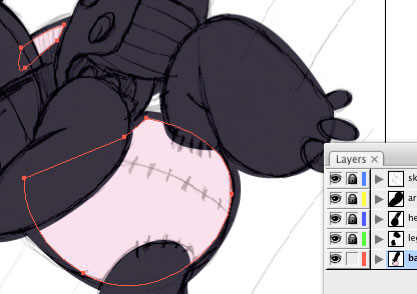
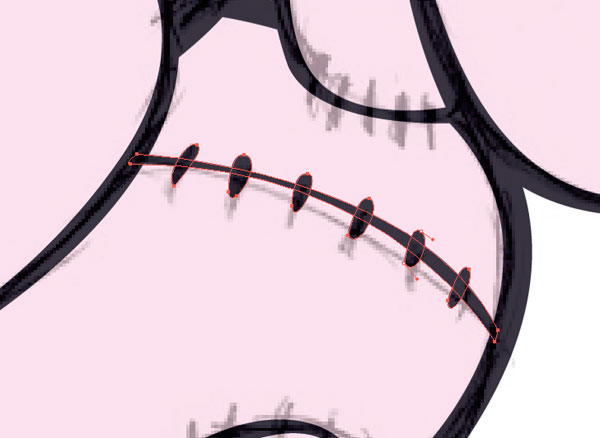
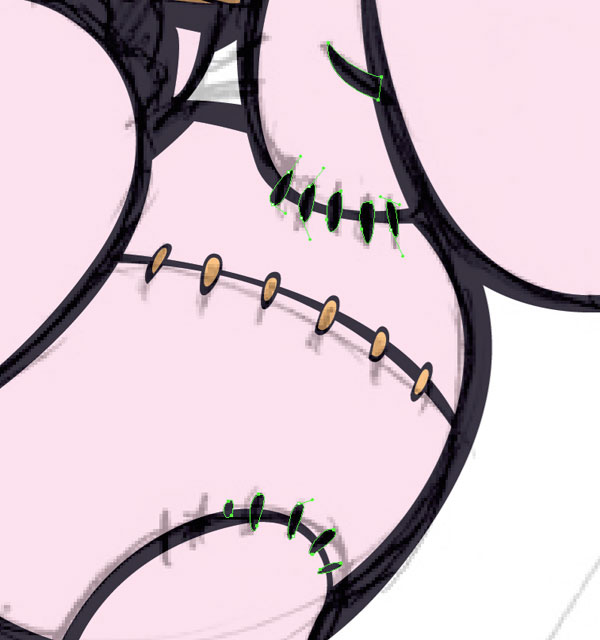
Staying on the "Back" layer, move down to the belly and use the same technique to make the seam and the stitching.
Step 20
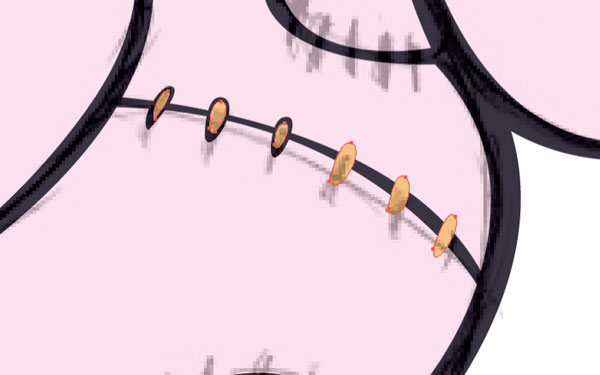
Select all the stitching (hold Shift and click on each stitch), Copy (Command + C) and Paste in Front (Command + F). Select the yellow brown swatch to change the color. Click away to deselect, then use the Selection tool to individually distort the fills to fit the outline.
Step 21
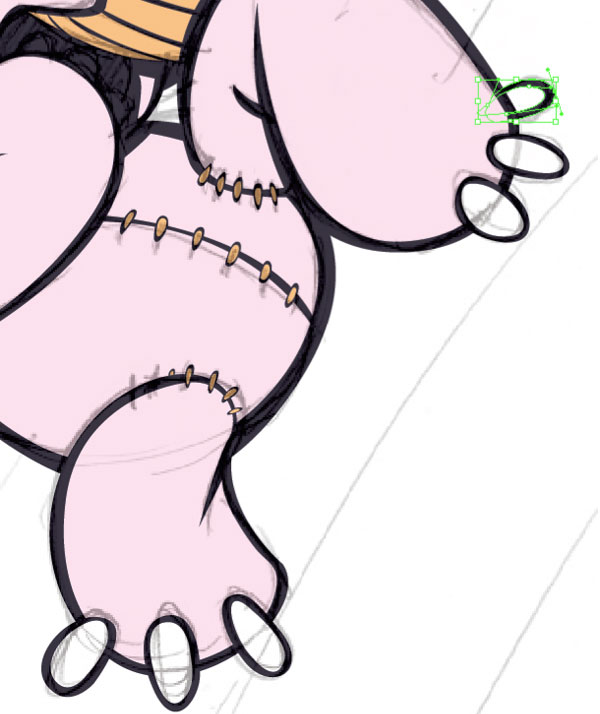
Lock the "body" layer and move on to the "Legs" layer. Select the black swatch, then use the Direct Selection tool (A) and then the Pen tool (P) to draw in the details as shown below. Follow the same method as above to create the stitch fills.
Step 22
Select the black shapes of the toe claws and move them to the top of the layer (Command + Shift + Right Bracket key). Select white as a fill color and make a swatch in the color group, draw in the claw details. Select the back toe and move the outline and fill to the bottom of the layer stack (Command + Shift + Left Bracket key).
Step 23
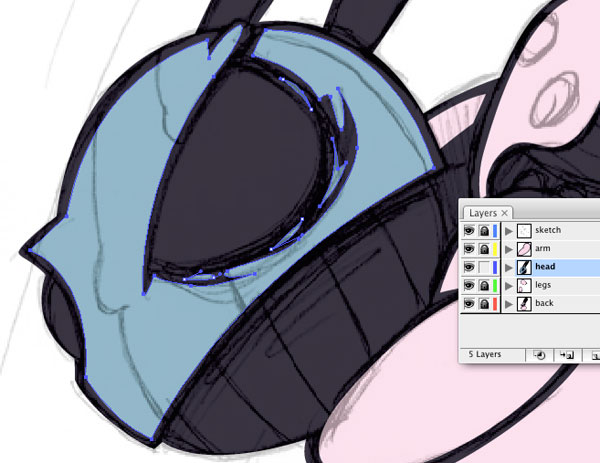
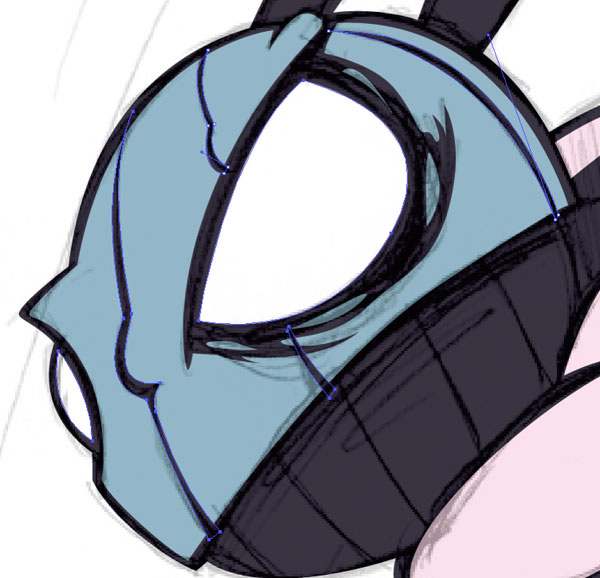
Lock the "Leg" layer and move to the "Head" layer. Keep white as the fill color and draw in the eyes. Select the black swatch and draw the mask lines in.
Step 24
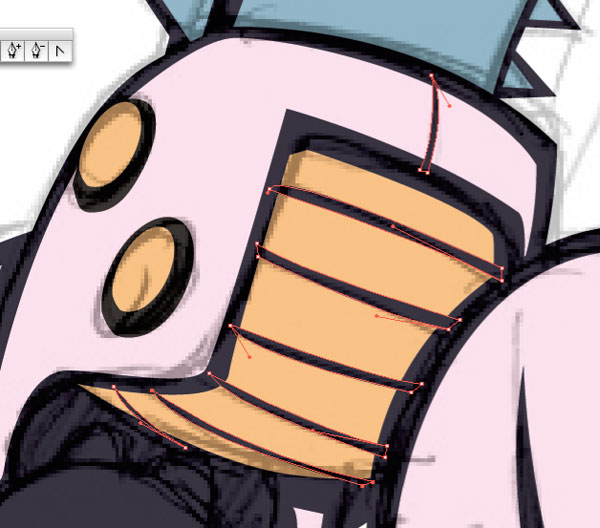
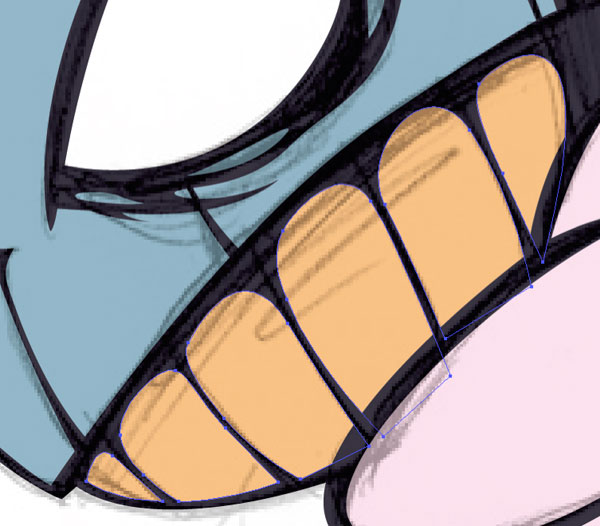
Select the yellow brown swatch and draw out the teeth, as you can see I outline them all. I find this gives a better finish.
Step 25
Select the pink swatch and draw elongated fills for the ears. Use the Selection tool (V) to select the fill and outline, then move them to the bottom of the layer stack (Command + Shift + Left Bracket key). The ears will be filled with a gradient to give a better speed effect at a later step.
Step 26
Lock the "Head" layer and unlock the "Arm" layer. Select white as the fill color and draw in his claws.
Step 27
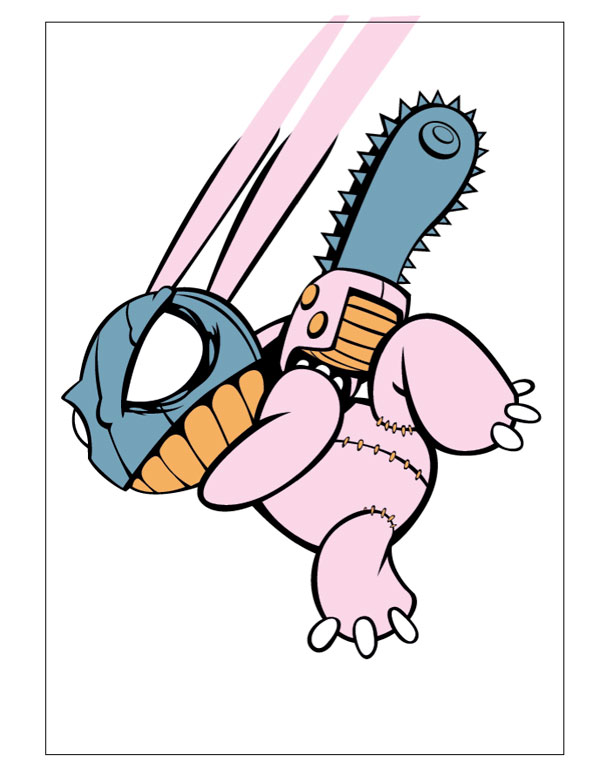
Turn the visibility of the "Sketch" layer off and zoom out to take a look at the figure. Adjust any points as necessary, if you wish you can go with completely different colors. Simply select a shape with the color you want to change, go to Select > Same > Fill color, then adjust the color using the color palette.
Step 28
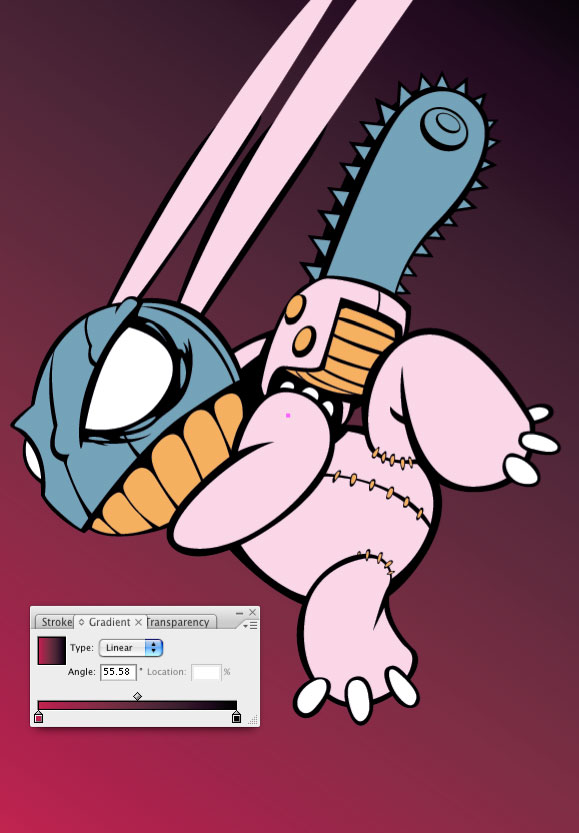
Lock all the layers and make a new layer "Background." Drag it to the bottom of the layer stack. Select the Rectangle tool (M), then in the Gradient Palette select a gradient type of Linear. Click on the gradients' left color swatch and in the Color Palette change the color to CMYK: C=18, M=100, Y=60, and K=8. Next, add the color to the color swatch group. Select the black swatch and drag it over to the right swatch in the Gradient Palette.
Select the Gradient tool (G) and run the gradient from the lower left corner to the upper right corner, the gradient begins where you first click and ends where you release.
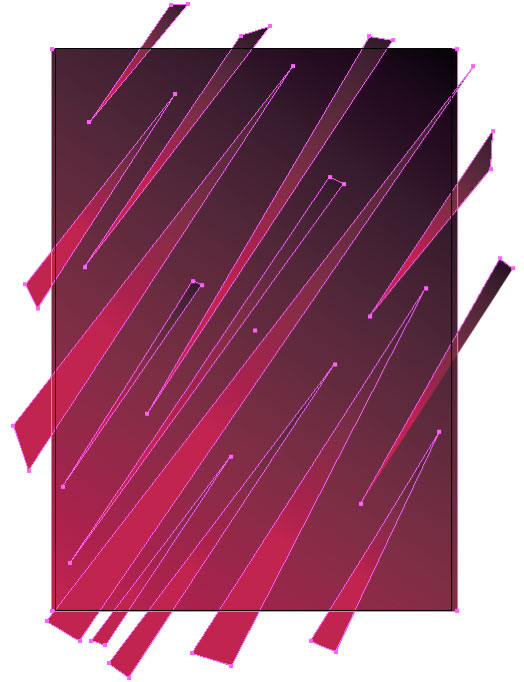
Step 29
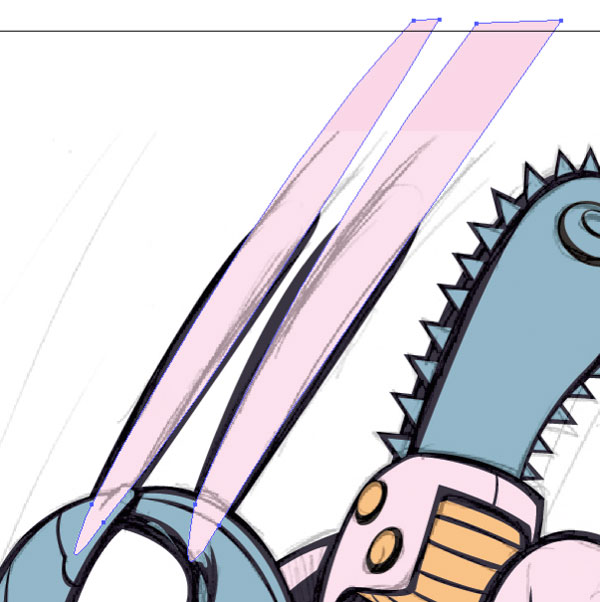
Select the Pen tool, keeping the same gradient fill, and staying on the same layer draw elongated spikes following the same angle as the background gradient. You can select the spikes individually and adjust the gradient using the Gradient tool (G) if necessary.
Step 30
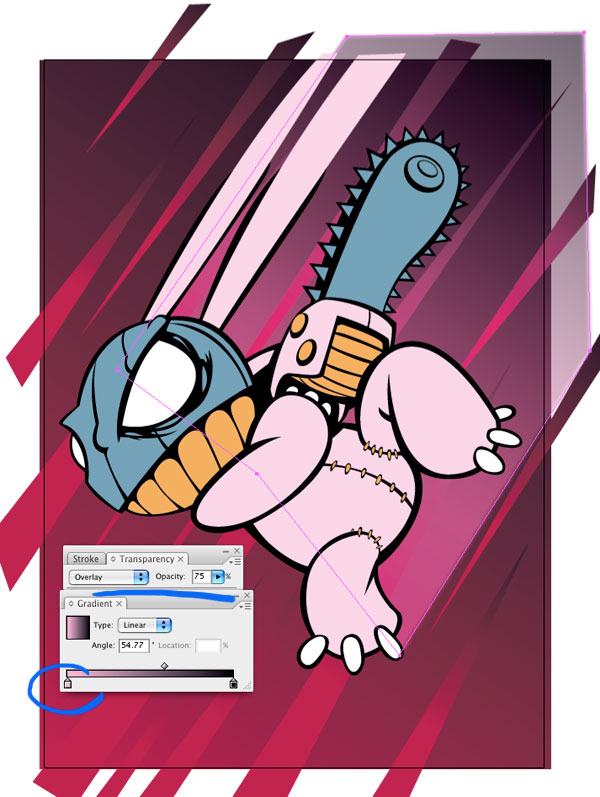
Deselect any objects by clicking away from the drawing. Click and drag the pink swatch from the Swatch Group to the left swatch within the Gradient Palette. Draw a trail shape coming from under and out behind the character as shown below.
In the Transparency Palette set the shapes' Blending Mode to Overlay and Opacity to 75%. Go to Effect > Blur > Gaussian Blur, and set the Radius to 9 pixels.
Step 31
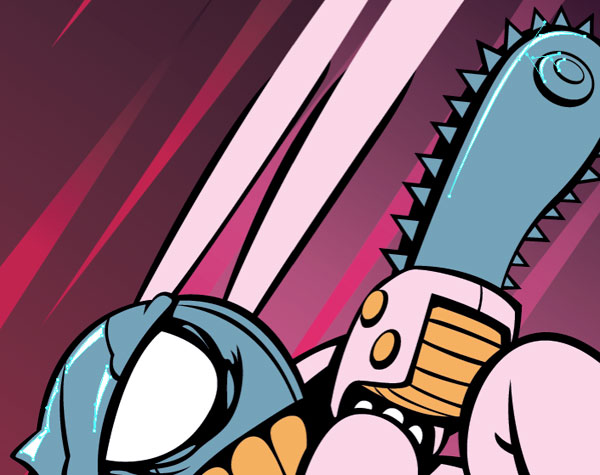
Lock the "Background" layer and make a new layer on top of the character layers. Name it Highlights. Use a white fill and draw in the highlights as shown.
Step 32
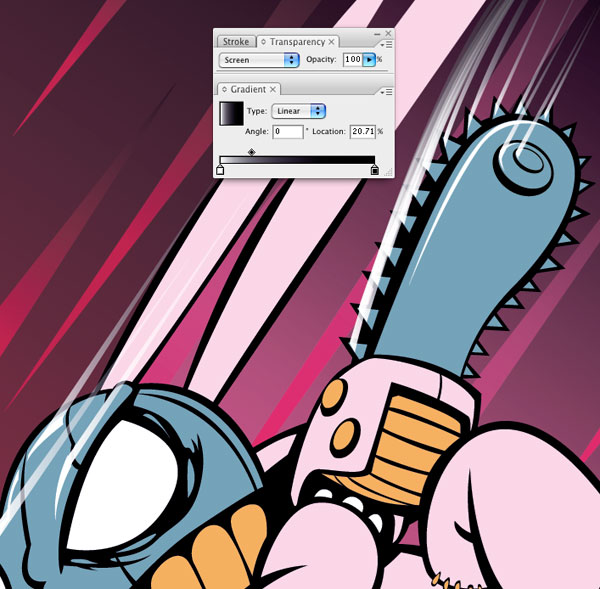
Emanating from the highlights are white streaks fading out. To make these select a linear gradient, drag the rich black swatch from the Swatch Group to the gradients right swatch, move the Location point to about 20%. Draw a thin triangle coming from each highlight point and also from each chainsaw blade. You can see below that I have curved the blade highlights to make it a bit more dynamic. Select all the streak objects then go to Select > Same > Fill color, and set the Transparency to Screen.
Step 33
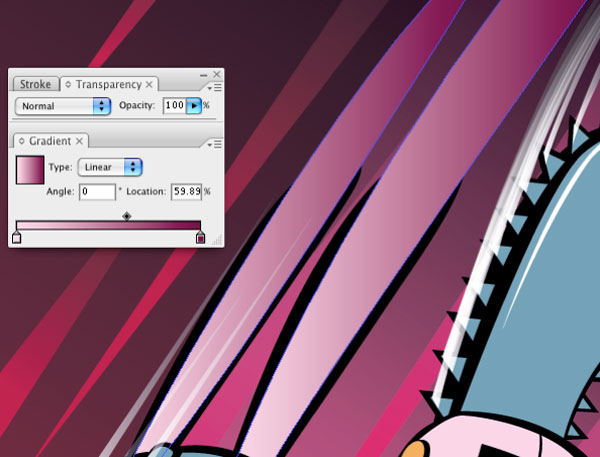
Unlock the "Head" layer and select the ear fill objects. From the Gradient Palette select Linear, then drag the pink swatch from the Swatch group to the left swatch in the Gradient Palette. Next, change the Location to 60% and double-click the right swatch to edit. In the Color Palette select: C=0, M=100, Y=0, and K=64.
Step 34
That's about it, the final step is to crop the area to the page. In the color Palette select no fill and no stroke, select the Rectangle tool (M) and draw a rectangle the size of the page area (it doesn't matter what layer you are on). With the rectangle selected go to Object > Crop Area > Make. Crop marks appear at the corners.
Conclusion
Now you can save the illustration as a JPG, GIF (Save For Web), PDF, EPS, etc (Save As) and the illustration will be nicely cropped. For more of Sean Kelly's crazed characters check out Bucket 'o' Thought.


I really like this tutorial I made for vectortuts.com.
ReplyDeleteI hope you got their permission before posting the whole thing
So I see that you actually are active on this blog, my friend. You've removed my comment, as well as other comments indicating your "hard work" ripping people off. Well, you'll get what you deserve soon enough.
ReplyDeleteI'd love to meet you face to face and tell you my opinion of you and your shady character.