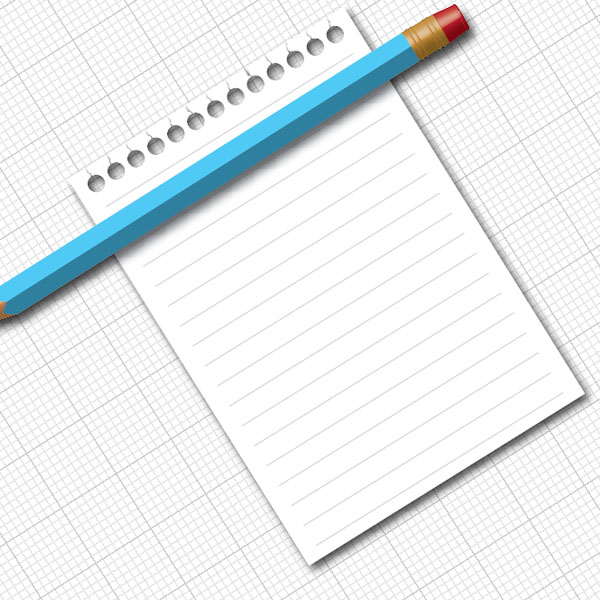
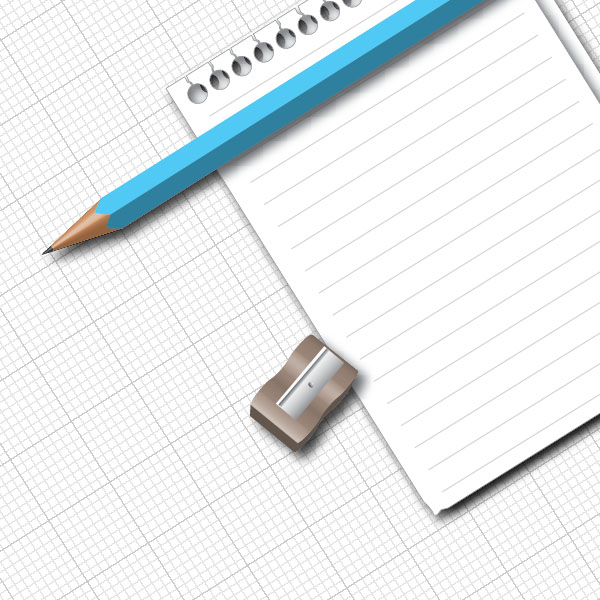
Paper Illustration
 In this tutorial, we'll explain how to create a vector pencil and paper illustration with some pencil shavings and a sharpener. We will explain how to use the 3D Revolve Tool and Extrude Tool and how to simulate a dark wood background.
Final Image Preview
Step 1
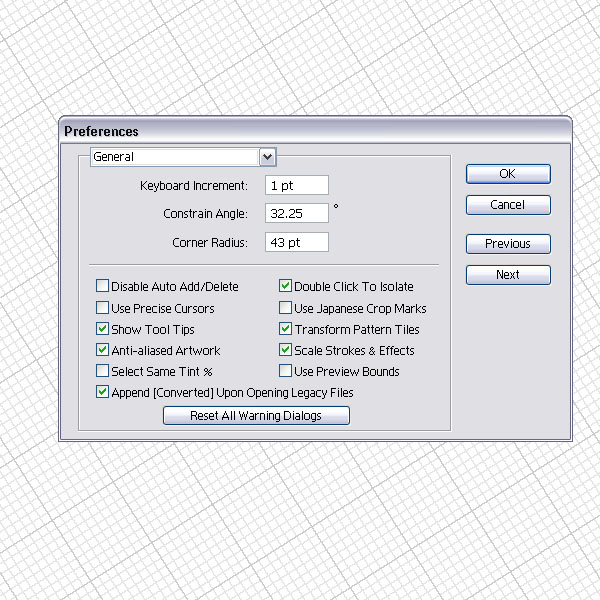
Before we begin, lets setup our grid. Open up the general settings by going to Edit > Preferences > General (Command + K) and set the Constrain Angle to 32.25 degrees. This will angle the grid and all created shapes in it will be angled that way.
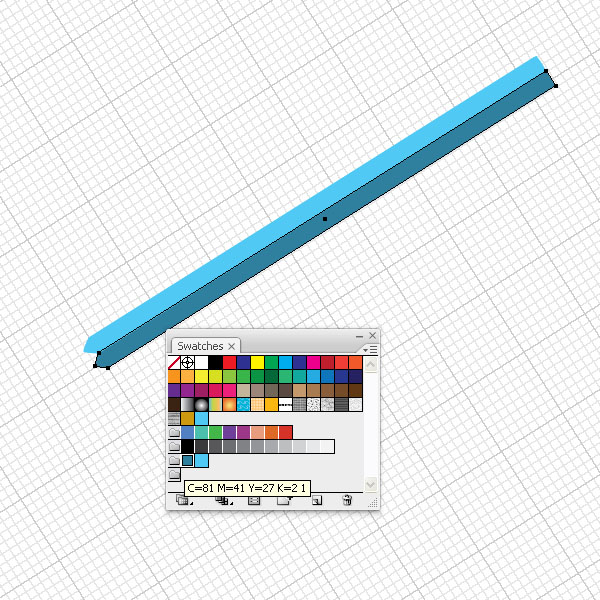
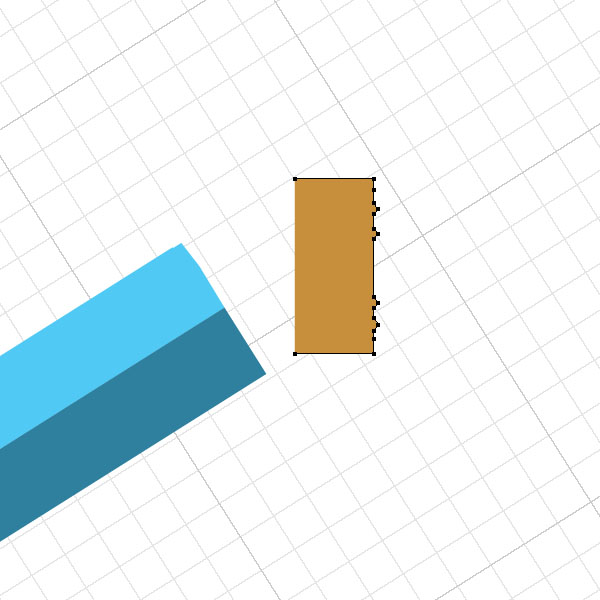
Step 2
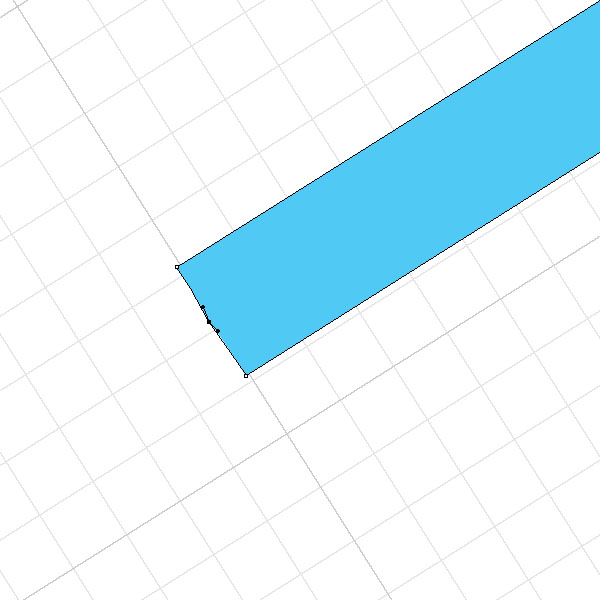
Select the Rectangle Tool (M) and draw a long rectangle filled with blue. Notice how the shape gets angled automatically along the grid.

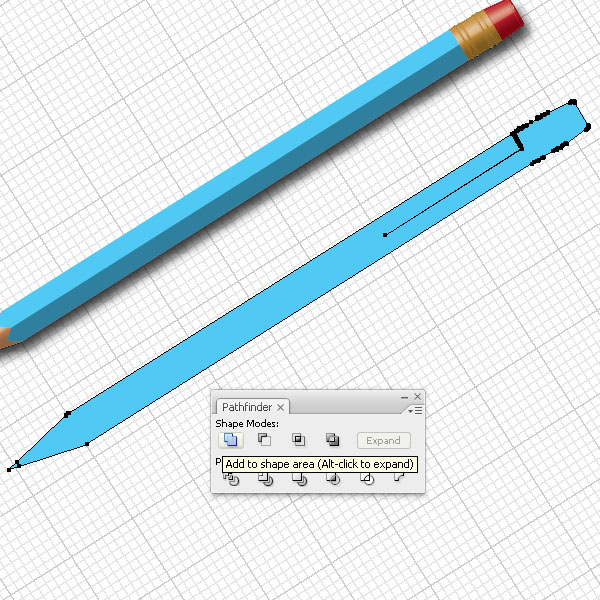
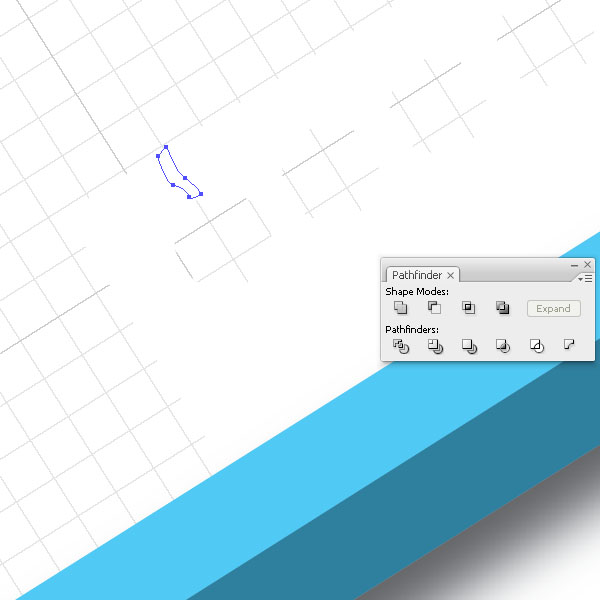
Step 3
Zoom into the left end and add a path point with the Pen Tool (P). Place it relatively into the middle.
Step 4
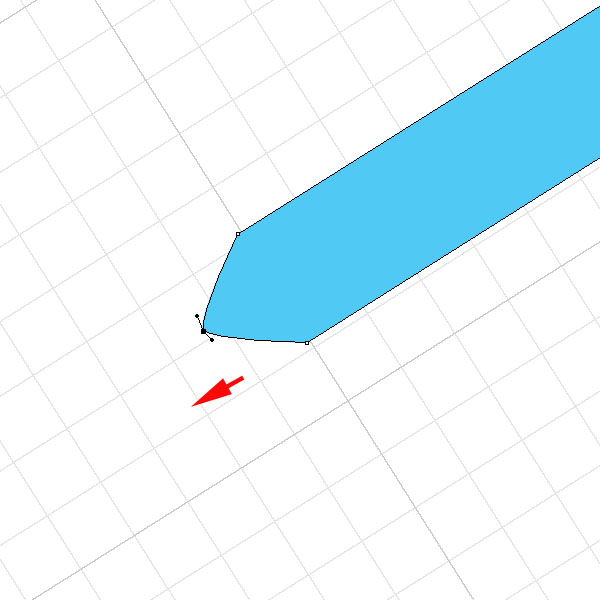
Then select the point with the Direct Selection Tool (A) and move it towards the left. Hold the Shift Key while doing that. This will keep it centered even though we are working on an angle.
Step 5
Duplicate the shape below the light blue one (Alt + Shift and drag) and fill it with a darker blue.
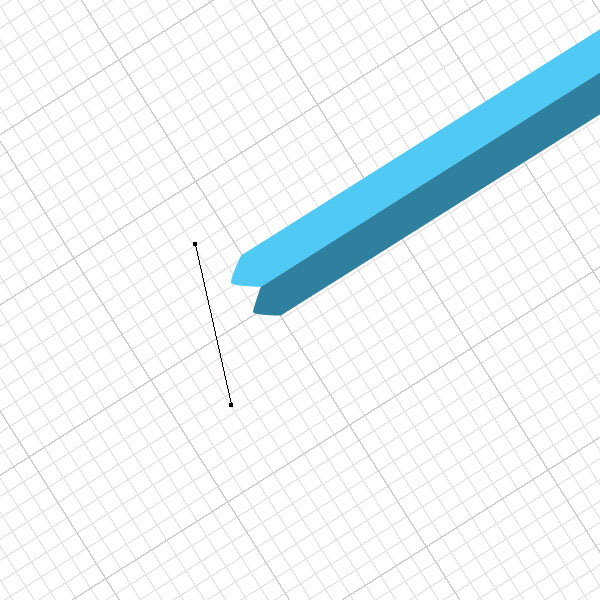
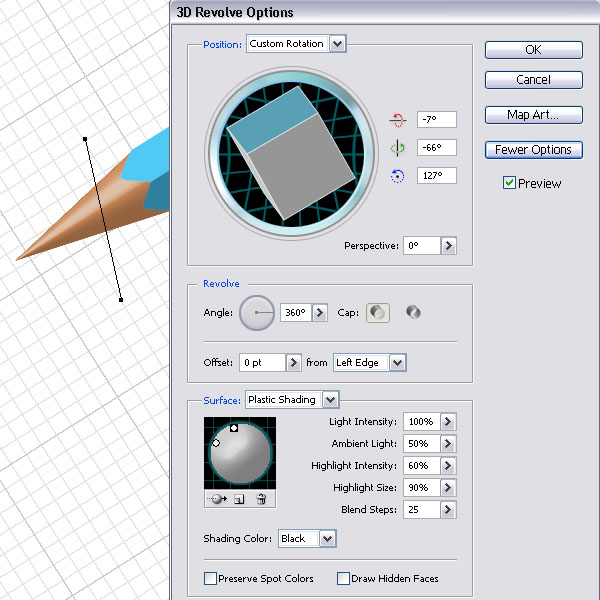
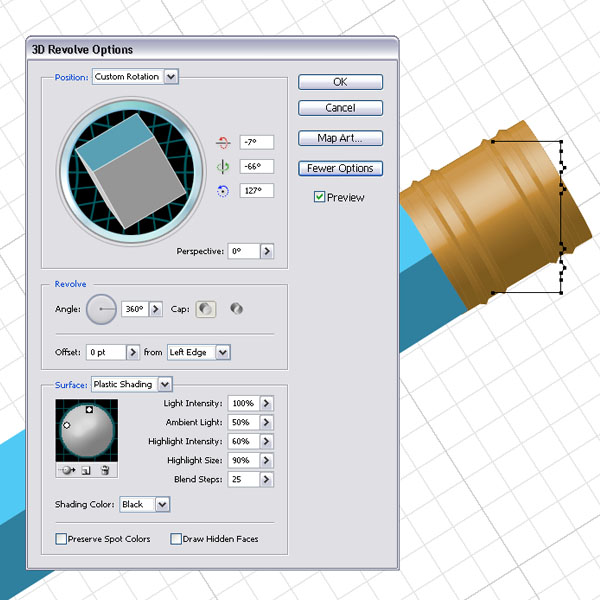
Step 6
Next, select the Pen Tool (P) and draw a beige line like you see in the image below. Make it slightly angled. Then got to Effect > 3D > Revolve and choose the settings you see in the image below. Make sure that you add extra highlight points. You might have to move it closer towards the blue pen shapes. Make sure you place it underneath them.
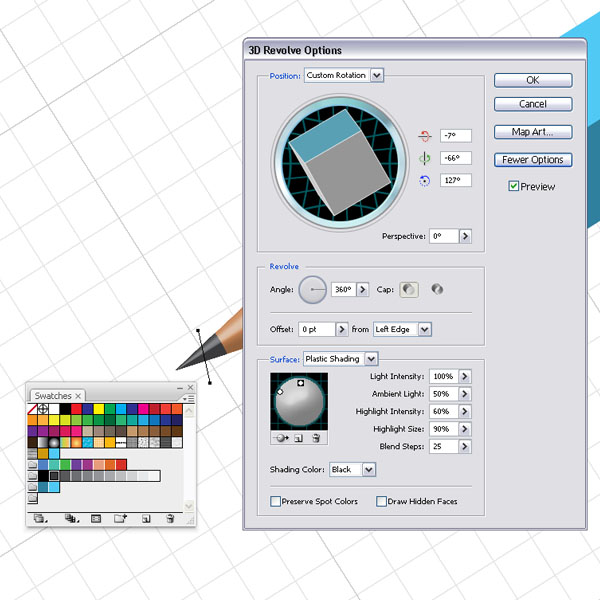
Step 7
Repeat Step 6 and add a much smaller dark grey line and apply the same 3D Revolve settings. This will be the lead tip of the pencil. You might have to move it closer to the wood tip that we created. Since the same settings are applied, the highlights match each other.
Step 8
Next, draw with the Pen Tool (P) a similar shape like you see in the image below. This will be the metal end of the pencil where the eraser tip is held in place. Make sure that the fill is set to a beige. Then repeat Step 7 and apply the 3D Revolve with the same settings.
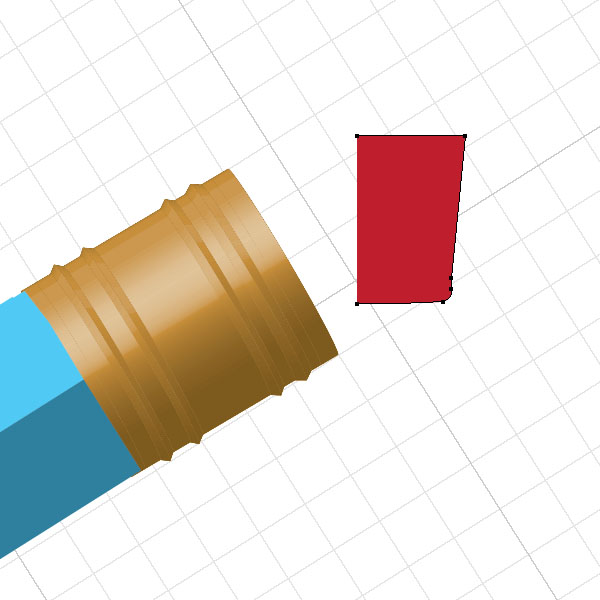
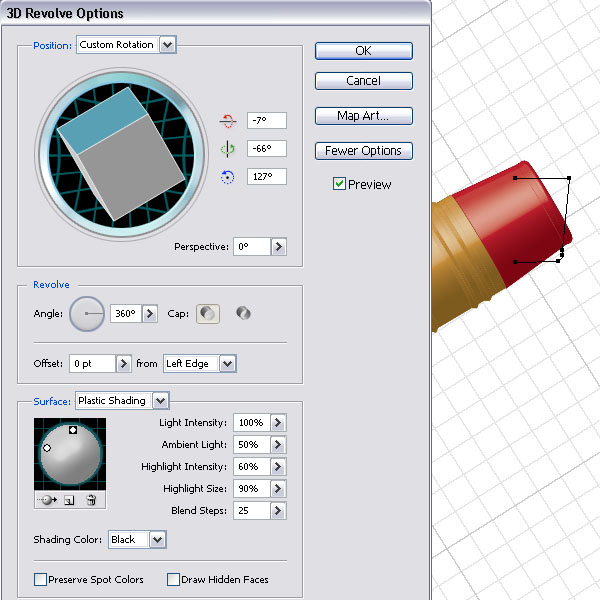
Step 9
For the eraser tip, create a similar red filled shape and a apply again the same 3D Revolve as in Step 8.
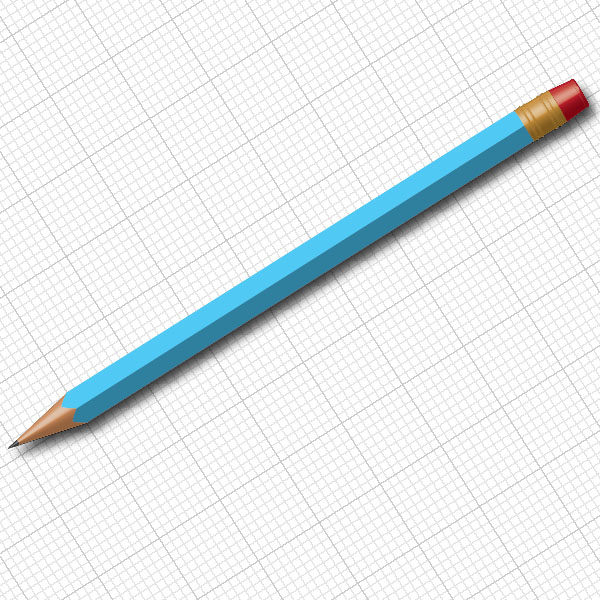
Step 10
Now we have created a pencil in a few easy steps. To give it a shadow like you see in the image, make a copy of all pencil shapes and expand their appearances. Then apply the Add to Shape Area in the Pathfinder Palette.

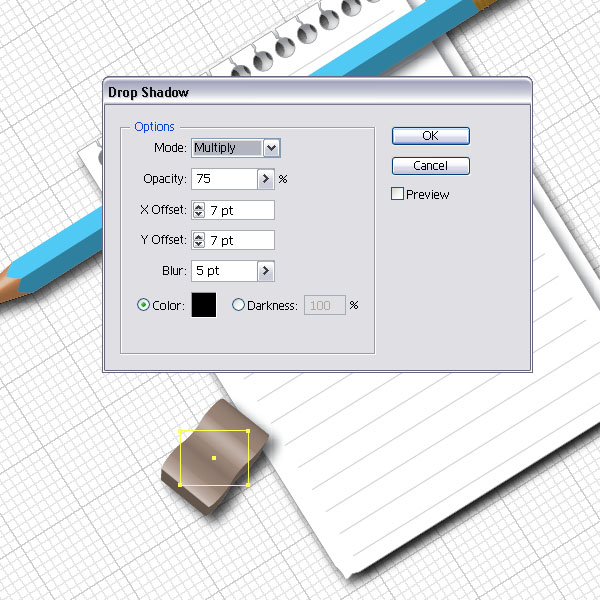
Step 11
Fill the expanded shape with a black and apply a drop Shadow (Effect > Stylize > Drop Shadow). Move the shape underneath the pencil.
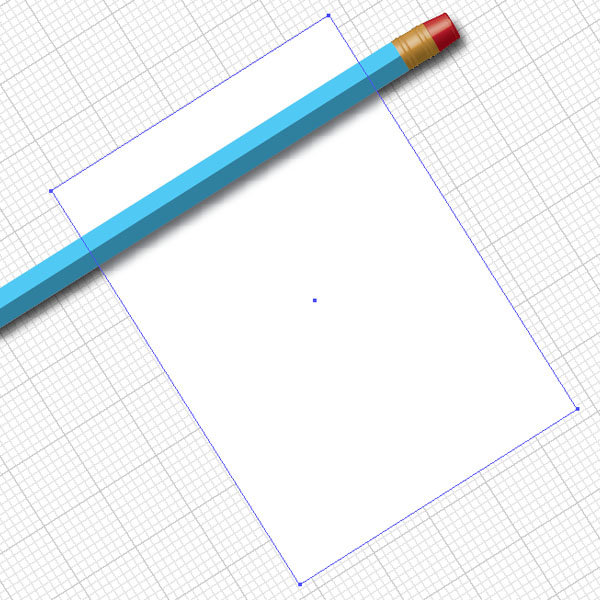
Step 12
Now on to the grid, create a rectangle with the Rectangle Tool (M) and fill it with white.
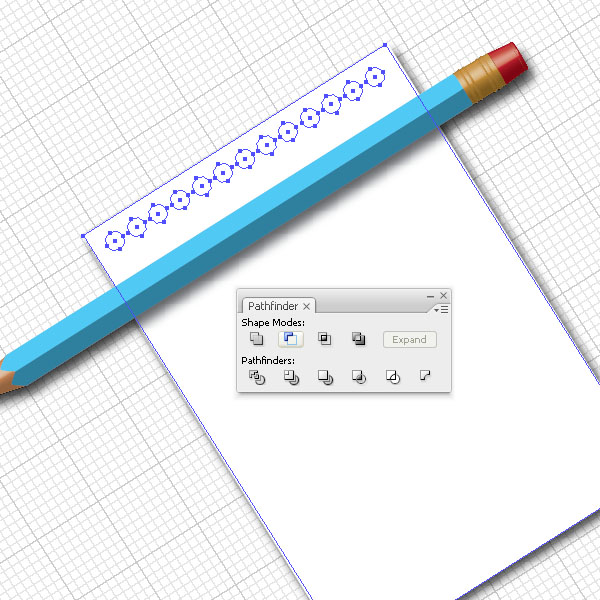
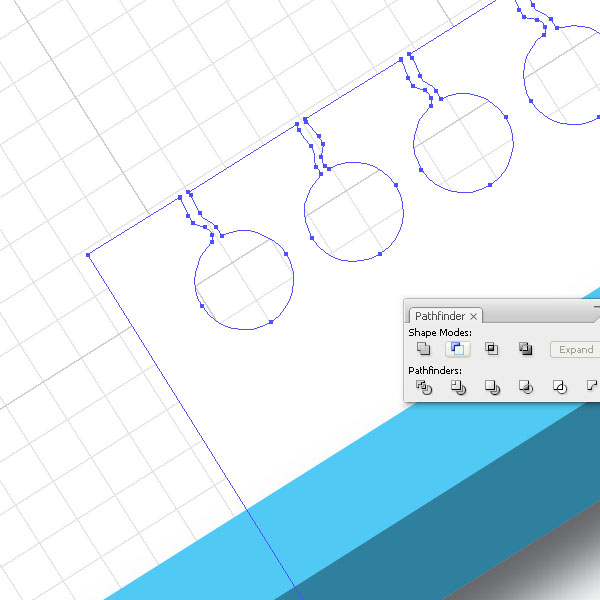
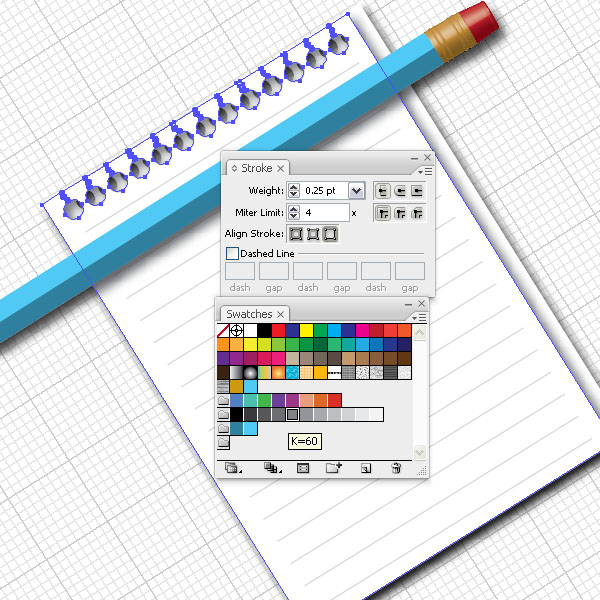
Step 13
Then create a small white filled circle (L), duplicate it (Alt + Shift + Drag) and hit Command + D eleven times. Make sure that there is a bit of a gap when duplicating the first circle. Then select all circles and the paper rectangle and select Subtract from Shape Area in the Pathfinder Palette.
Step 14
We need to add a torn paper effect. Create a polygon shape (with the Pen Tool) and repeat Step 13. Make sure that the polygon shape overlaps the paper and the circle hole. After applying the Subtract to Shape Area, you should have a similar shape shown in the image below.
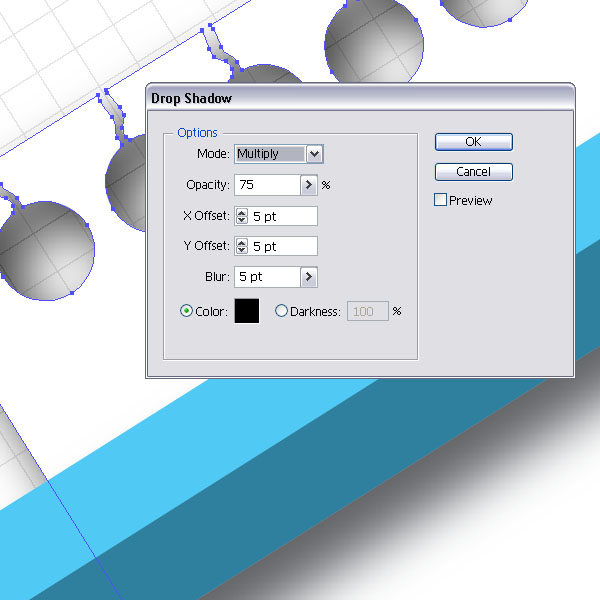
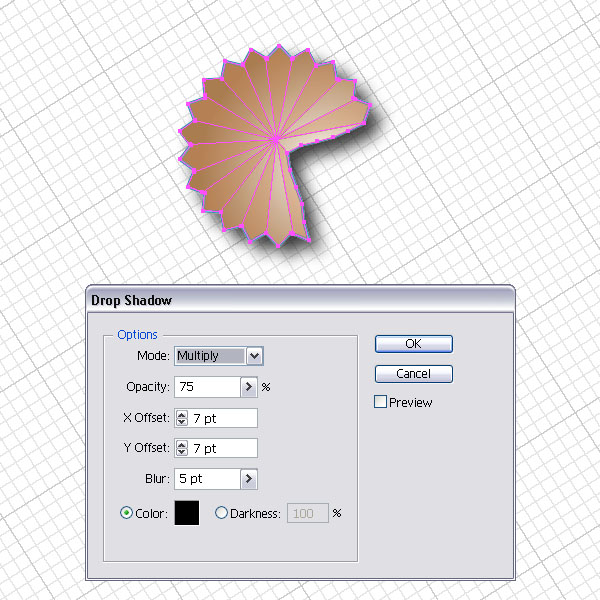
Step 15
Select the just created shape and add a Drop Shadow.
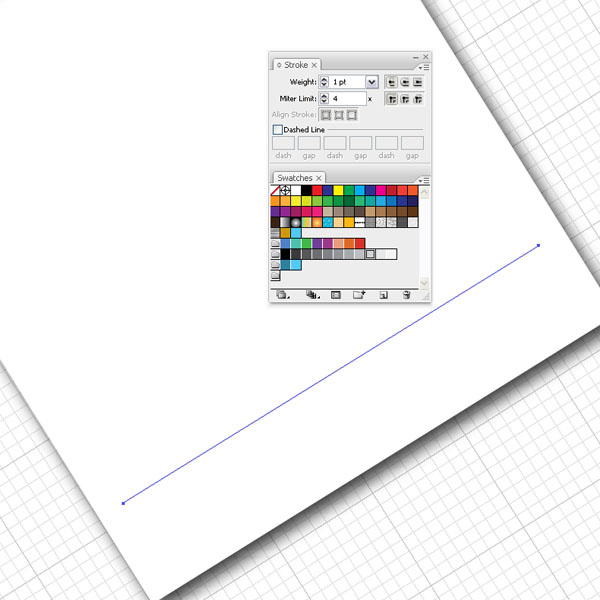
Step 16
A note paper needs some lines. Draw a line with the Pen Tool (P) and set the Stroke to 1pt in a light grey color. Then duplicate it (Alt + Shift + Drag) and hit Command + D several times, depending on the distance you applied while dragging.
Step 17
Select the paper shape and the lines, group them and duplicate the group. Move it slightly to the left and bottom.
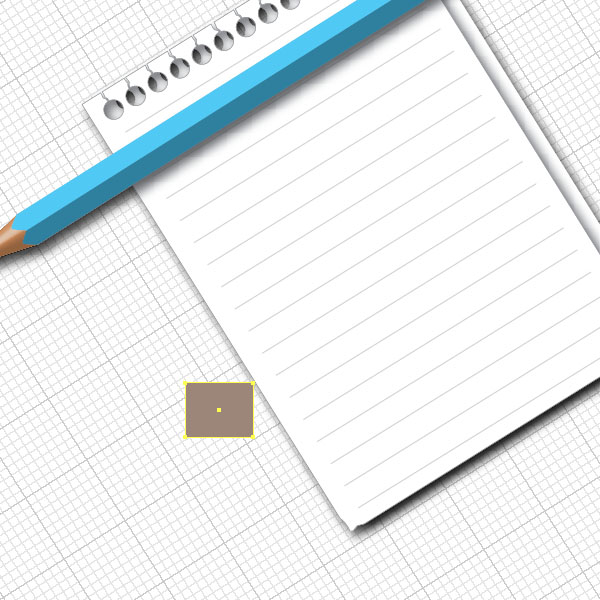
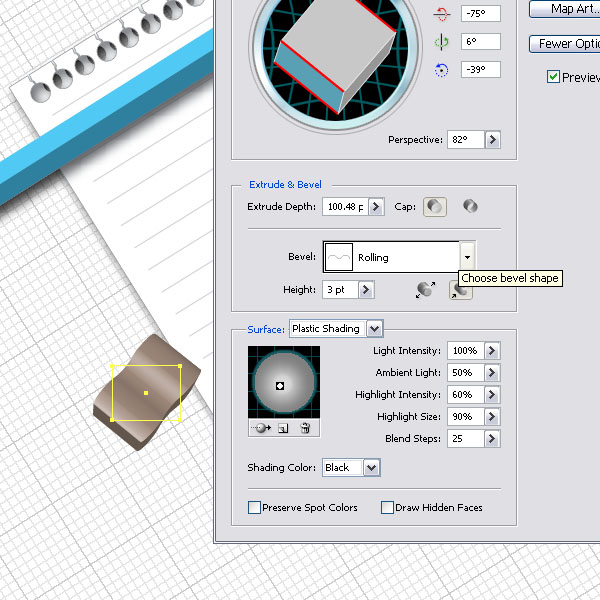
Step 18
On to the pencil sharpener. Create a rectangle (M) and fill it with a dirty beige to brown gradient. Then go to Effect > 3D > Extrude & Revolve. Choose the Bevel Style: Rolling in the drop down menu. Set the size to 3pt. Extrude it 100pt and apply the angles you see in the image below. This will create a simple but effective sharpener shape. Add a Drop Shadow to it.
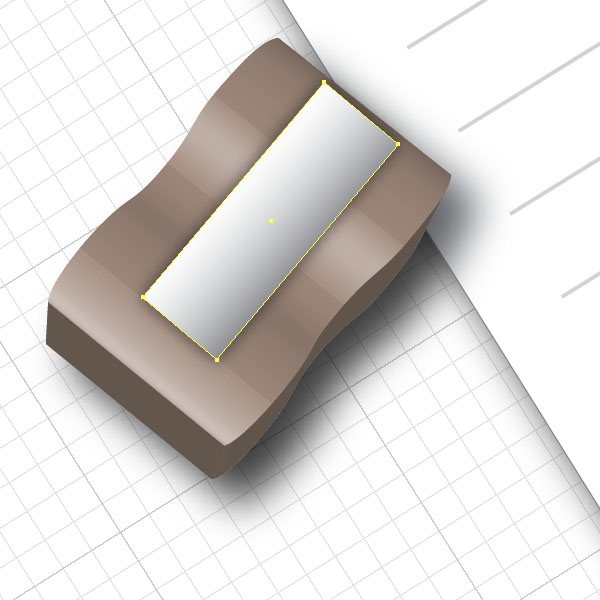
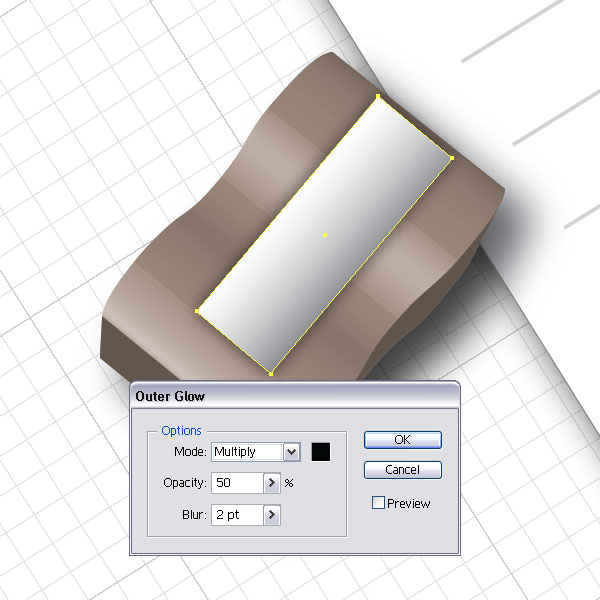
Step 19
For the blade, create a rectangle and fill it with a linear white to black gradient. Then add an Outer Glow.
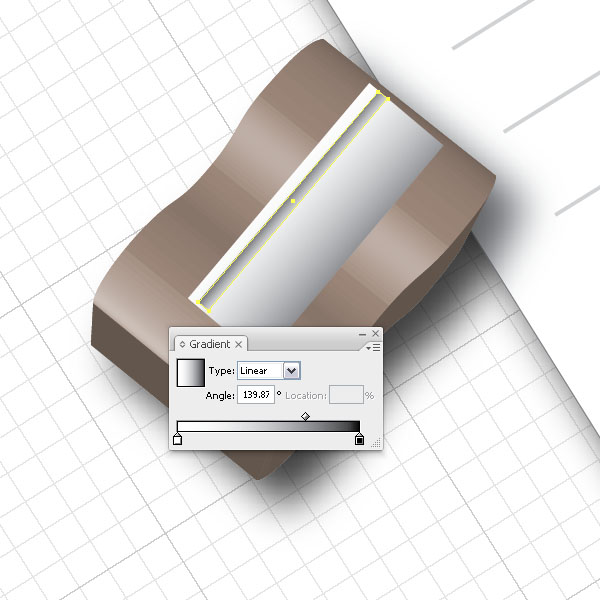
Step 20
Add another rectangle smaller in width and fill it again with a linear gradient. Add a small dark grey circle that will act as a screw holding the blade in place.
Step 21
This is how the sharpener should look like.
Step 22
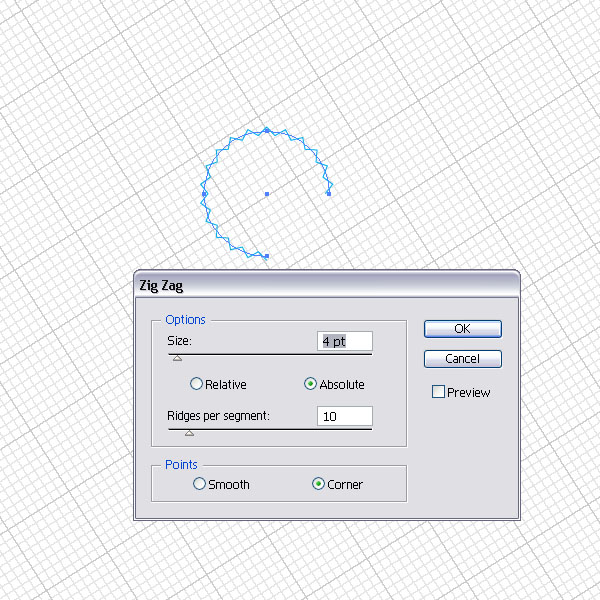
Next step is to create some pencil shavings. Create a circle and cut away the bottom quarter by selecting the Scissor Tool (C) and clicking on the two path points each at a time. Then select (A) the small quarter circle and delete it. Select the rest of the circle and apply the zig zag effect by going to Effect > Distort & Transform > Zig Zag, then Expand the effect.

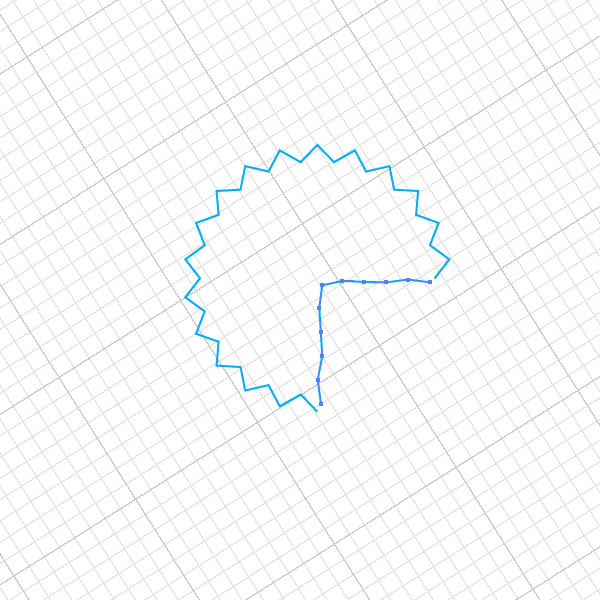
Step 23
Add a line so we can close the three fourths zigzag circle. Select the end points of the line and the circle shape each at a time, then join them (Command + J). It is important to ungroup the zig zag shape, just in case you cannot join them. Anytime there is an effect expanded, it gets automatically grouped.
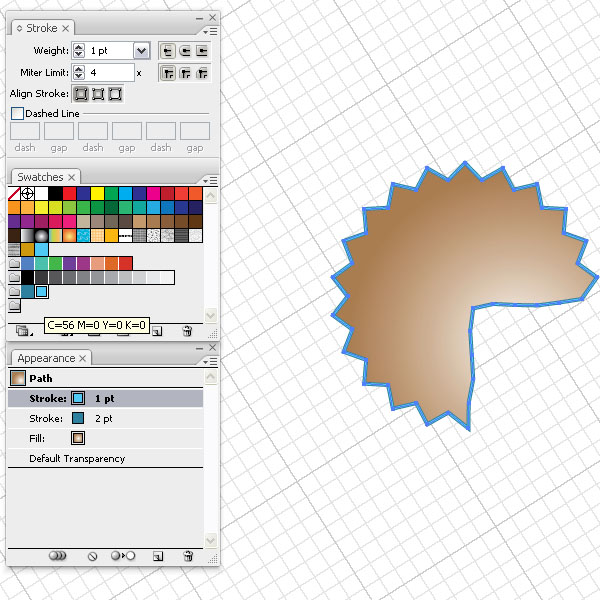
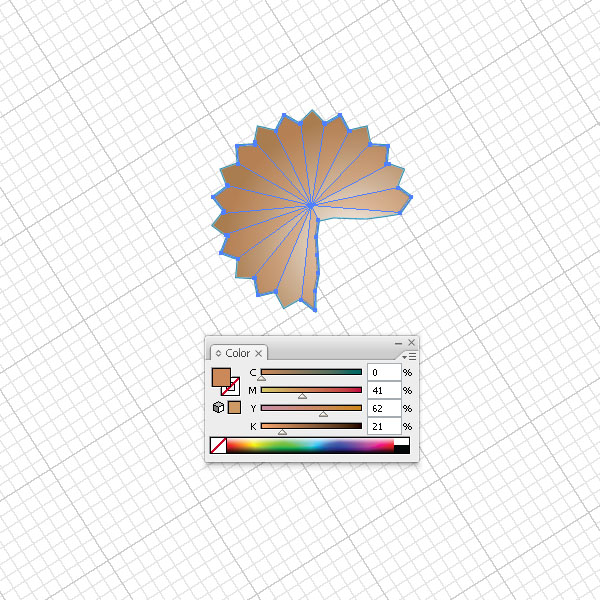
Step 24
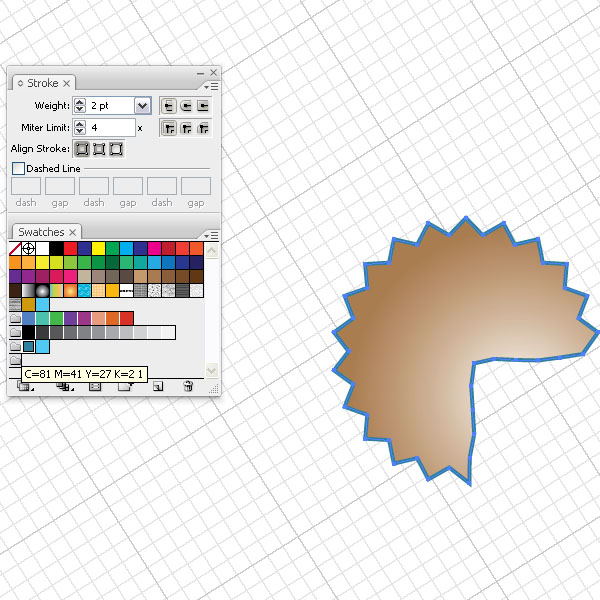
Fill the shape with a beige to white radial gradient and add a light blue Stroke of 2pt. Then via the Appearance Palette, add another Stroke of 1pt and set the Stroke color to dark blue.
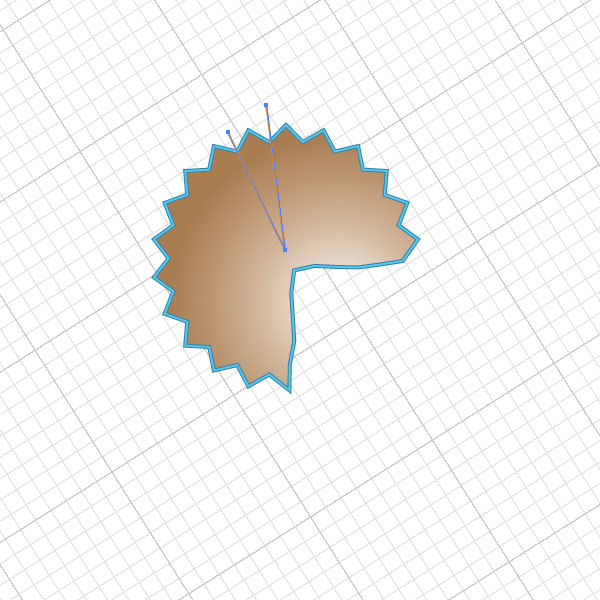
Step 25
In order to create some segments to the shavings, create a line like in the image below. Select it and rotate it while at the same time duplicating it. You can do that by selecting the Rotate Tool (R), then click on the center once. Next, hold Alt + Shift and drag clockwise. Then hit Command + D several times.
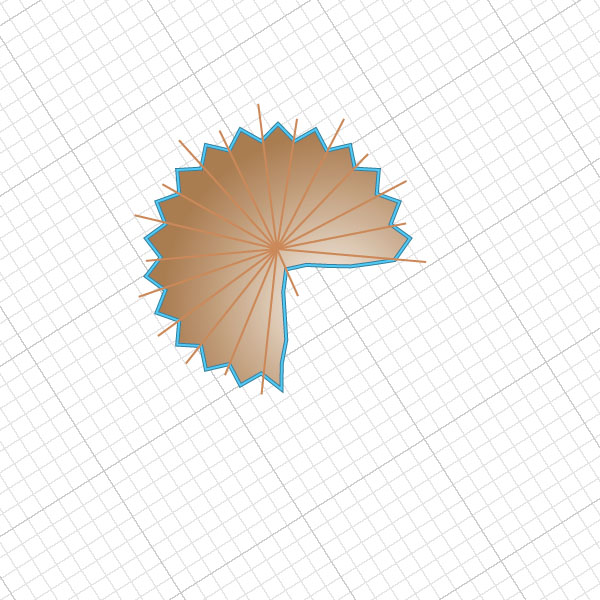
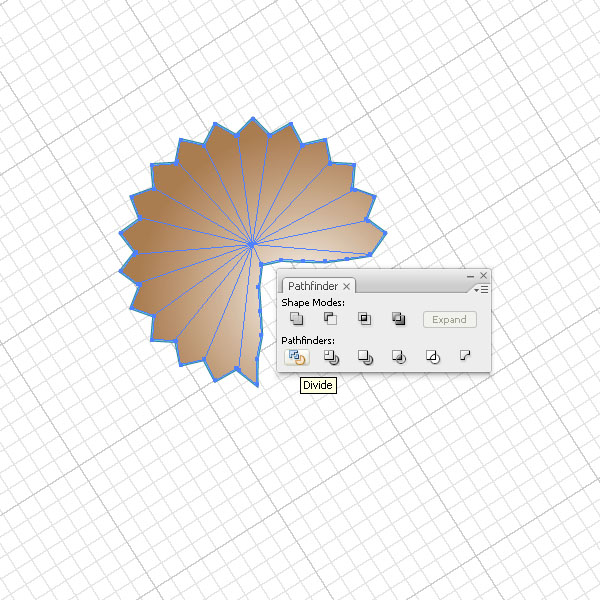
Step 26
Duplicate the zig zag circle shape in front (Command + F). Then select the duplicated shape and the lines and hit the Divide option in the Pathfinder Palette.
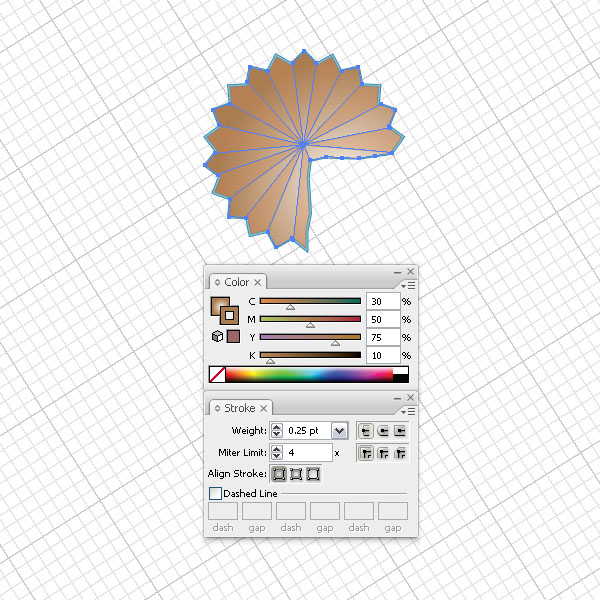
Step 27
Select each second shape with the Direct Selection Tool (A) and fill them with a beige color. Then select the other shape segments and add a Stroke of 0.25pt and set the Stroke color to a darker beige. Group the shaving shapes and add a Drop Shadow.
Step 28
I made several copies of the shavings and scaled and rotated them.
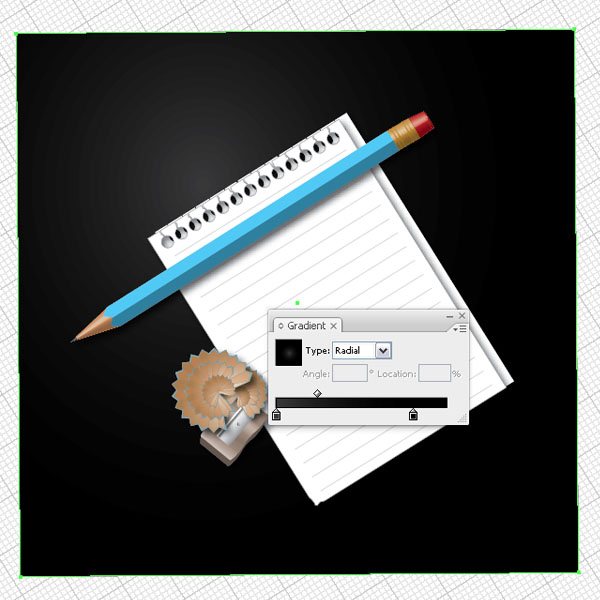
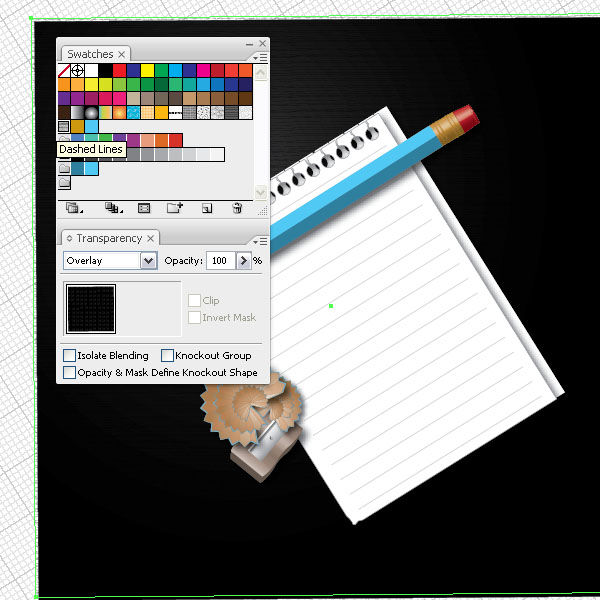
Step 29
Let's add a dark wood background. Create a square (M) or rectangle and fill it with a radial grey to black gradient. Set the gradient highlight towards the left top. Then duplicate the shape on top (Command + F) and fill it with a pattern called Dashed Lines. You can find default patterns easily by going to Window > Swatch Libraries > Patterns > Basic Graphics > Basic Graphics_Lines. The original gradient will be overridden. Then set the layer transparency to Overlay.
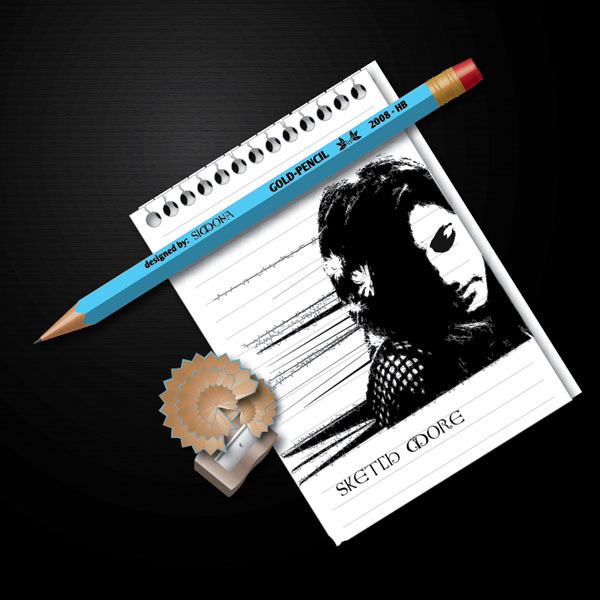
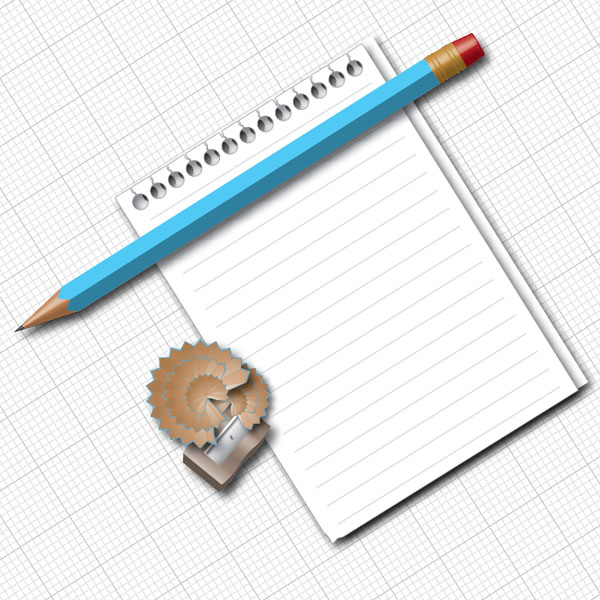
Conclusion
This is the final image of our illustration. I added some text to the pencil to personalize it and a sketch-like drawing. This was done by live tracing an image and modifying it a little. I hope you had fun!


No comments:
Post a Comment